第一节:写在前面

1.1:主题选择

在搭建 Hexo 博客的过程中,我尝试过很多主题,每个主题都有自己鲜明的特点。截止到我发布这篇文章,Hexo 已经有 400 多个主题了,但是其中能拿得出手的也就二十多个。如果你是第一玩 Hexo,面对这么多主题肯定得眼花缭乱,尤其像我这种完美主义者,再加上患有很严重的选择困难症,真是不知道该选择哪个好!往往是刚开始选择了一个主题并折腾了一番以后,又发现别的主题有一个很牛逼的功能,就又想换主题了,反反复复,很是折腾!

再后来慢慢折腾不动了,终于想明白了一个道理,个人博客最重要的是内容,而不是“颜值”,踏踏实实写好博文才是博客真正的魅力!但所谓“颜值即正义”,选择一个好看的主题也是第一步!经过最终的选择比较,我选择了 Butterfly 主题,主要是因为这个主题具备以下几个优势:

  1. 颜值高。Butterfly 的颜值可是数一数二的,这一点只有你用过很多种主题以后才能有所体会;
  2. 可扩展性强。Butterfly 自带的配置文件有一千行,集成了很丰富的外观和功能扩展,通过简单配置就可实现;
  3. 社区良好。Butterfly 一直在不断更新,并且开发者是香港人,中文文档良好,遇到了问题查找解决方案比较简单;

但除此之外,我认为它还有一个不算缺点的缺点,就是它的灵活度太高了。怎么说呢?刚开始起步的时候,需要配置的东西比较零散,需要耐心!

友情提示,我这篇博文的主要内容包括两个部分:

  • 更换主题:Hexo 博客更换每个主题的方式都一样,我这篇博文是以 Butterfly 来举例的;
  • 基本配置:更换主题后,需要生成基本页面、替换博主自己的资料、内置的功能需要手动配置;

1.2:基本环境

我本地使用的是 macOS Tahoe 25.6.2,基本软件环境如下:
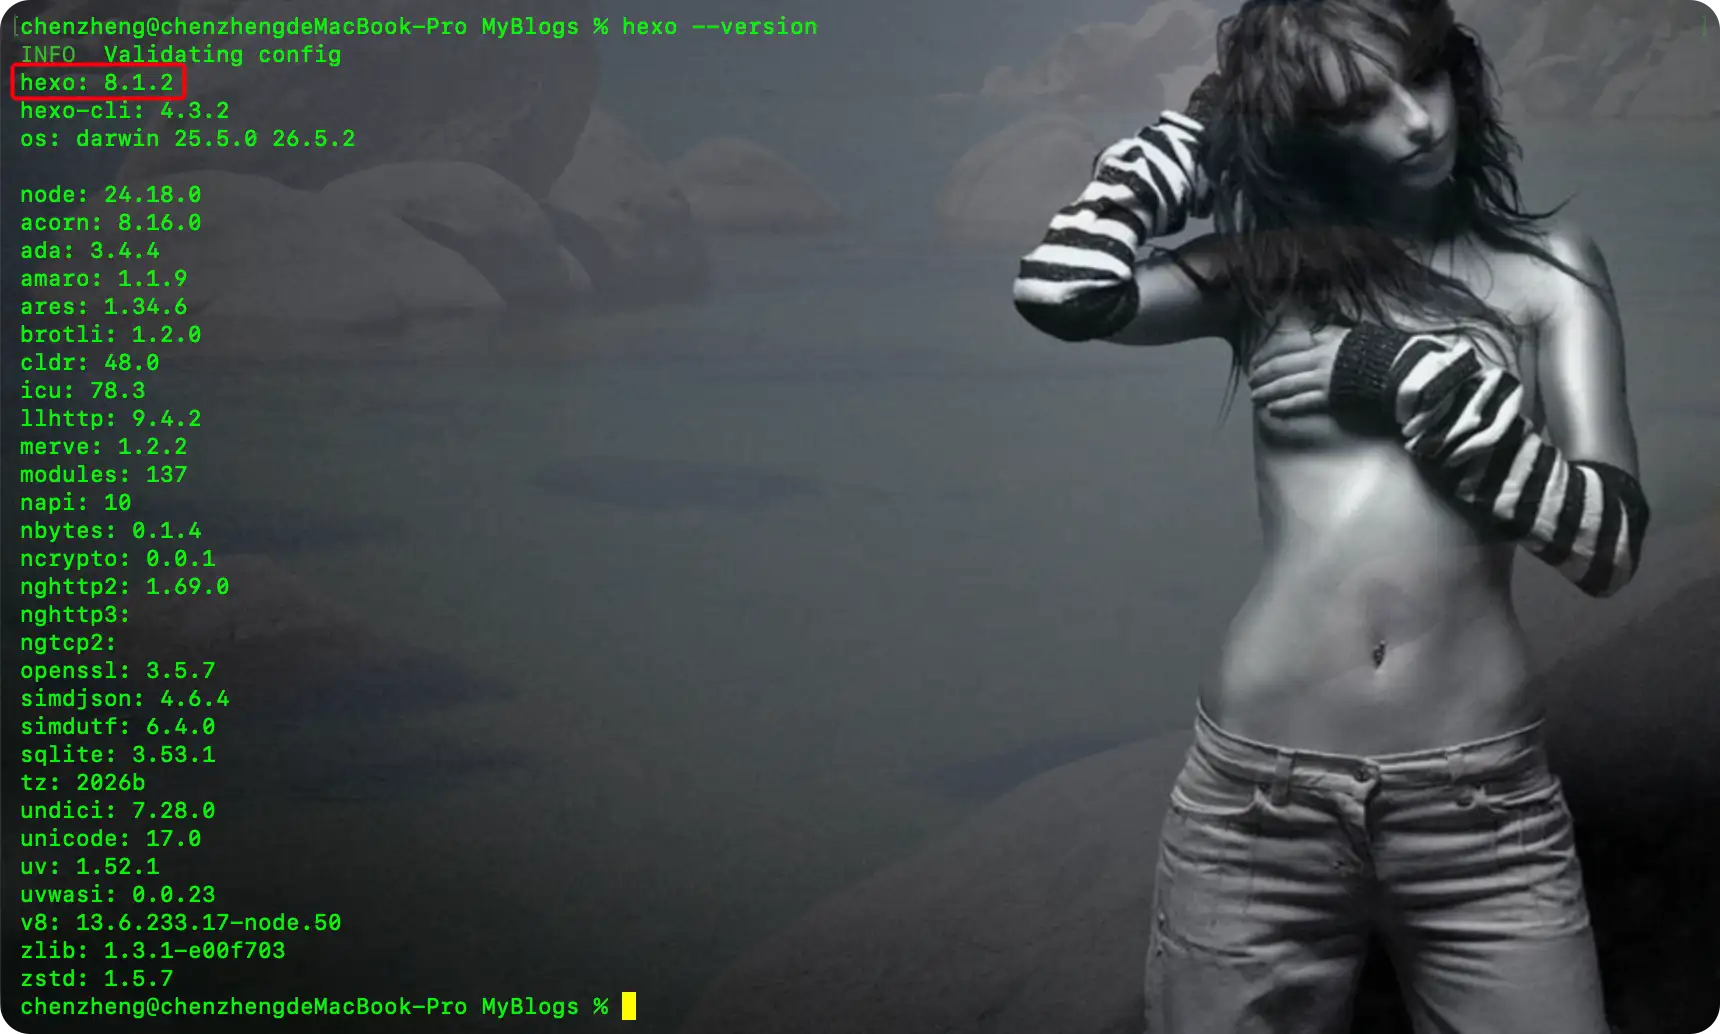
Hexo 自带的 npm 包如下:
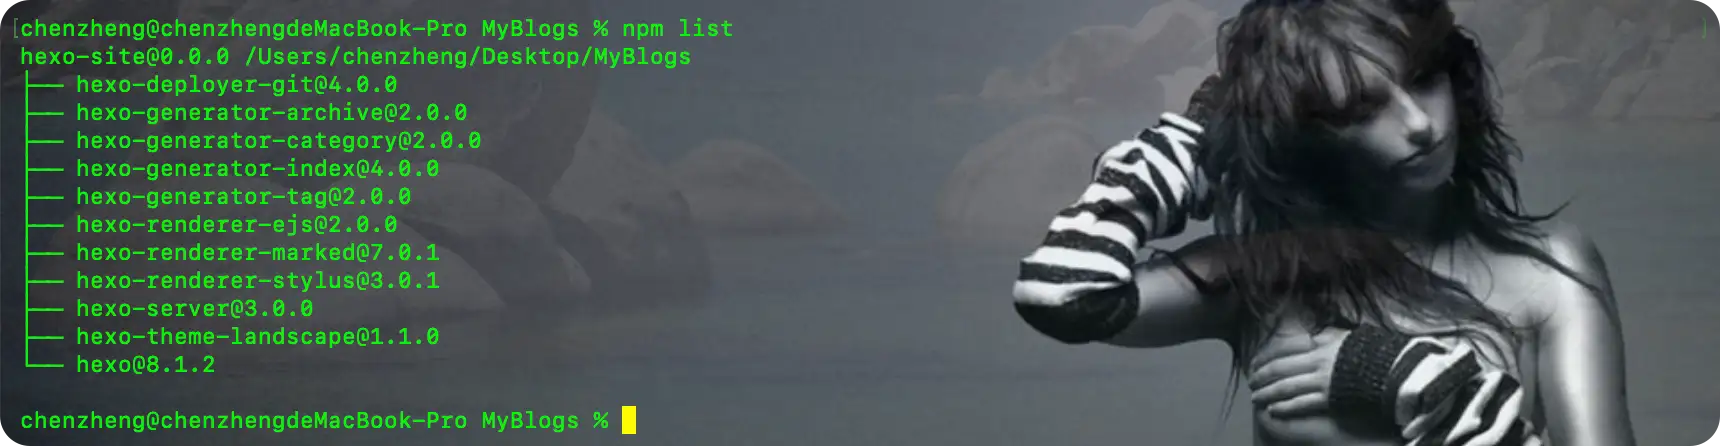
在当前所有的依赖里面,只有hexo-deployer-git是我自己安装的,是为了支持将本地生成的静态博客文件上传到 Github,其他的都是 Hexo 程序自带的!

第二节:更换主题

2.1:下载主题

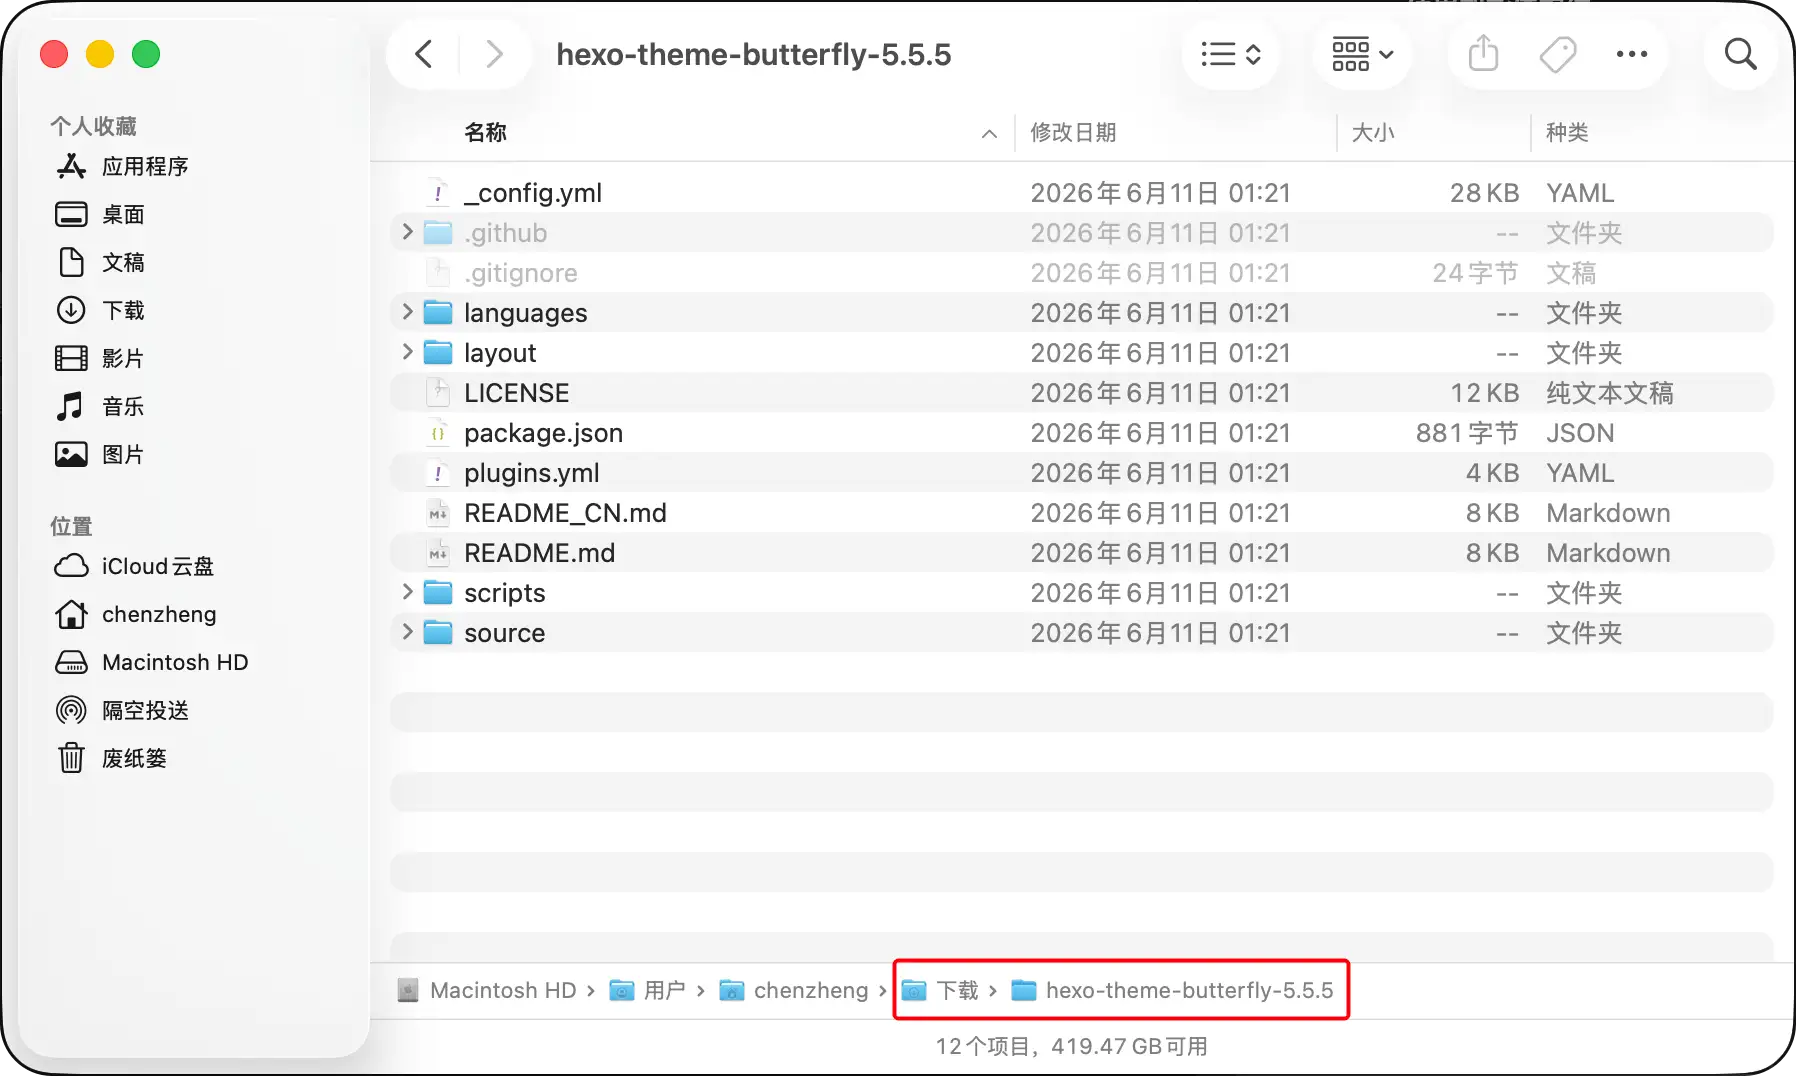
Butterfly 主题是托管在 Github 上的:传送门。默认分支是开发分支 dev,我选择下载稳定版本,截止到我当前更新这篇博文的时间,最新的稳定版本是 5.5.5 !你可以在本地博客工程的/themes文件夹下使用 Git 来 clone 主题文件夹,也可以从 Github 网页上直接下载,我是直接从网页上下载的,解压后:
2.2:更换主题

第一步:重命名并移动

将下载下来的主题文件夹重命名为butterfly,并放到本地博客工程目录下的/themes文件夹中:
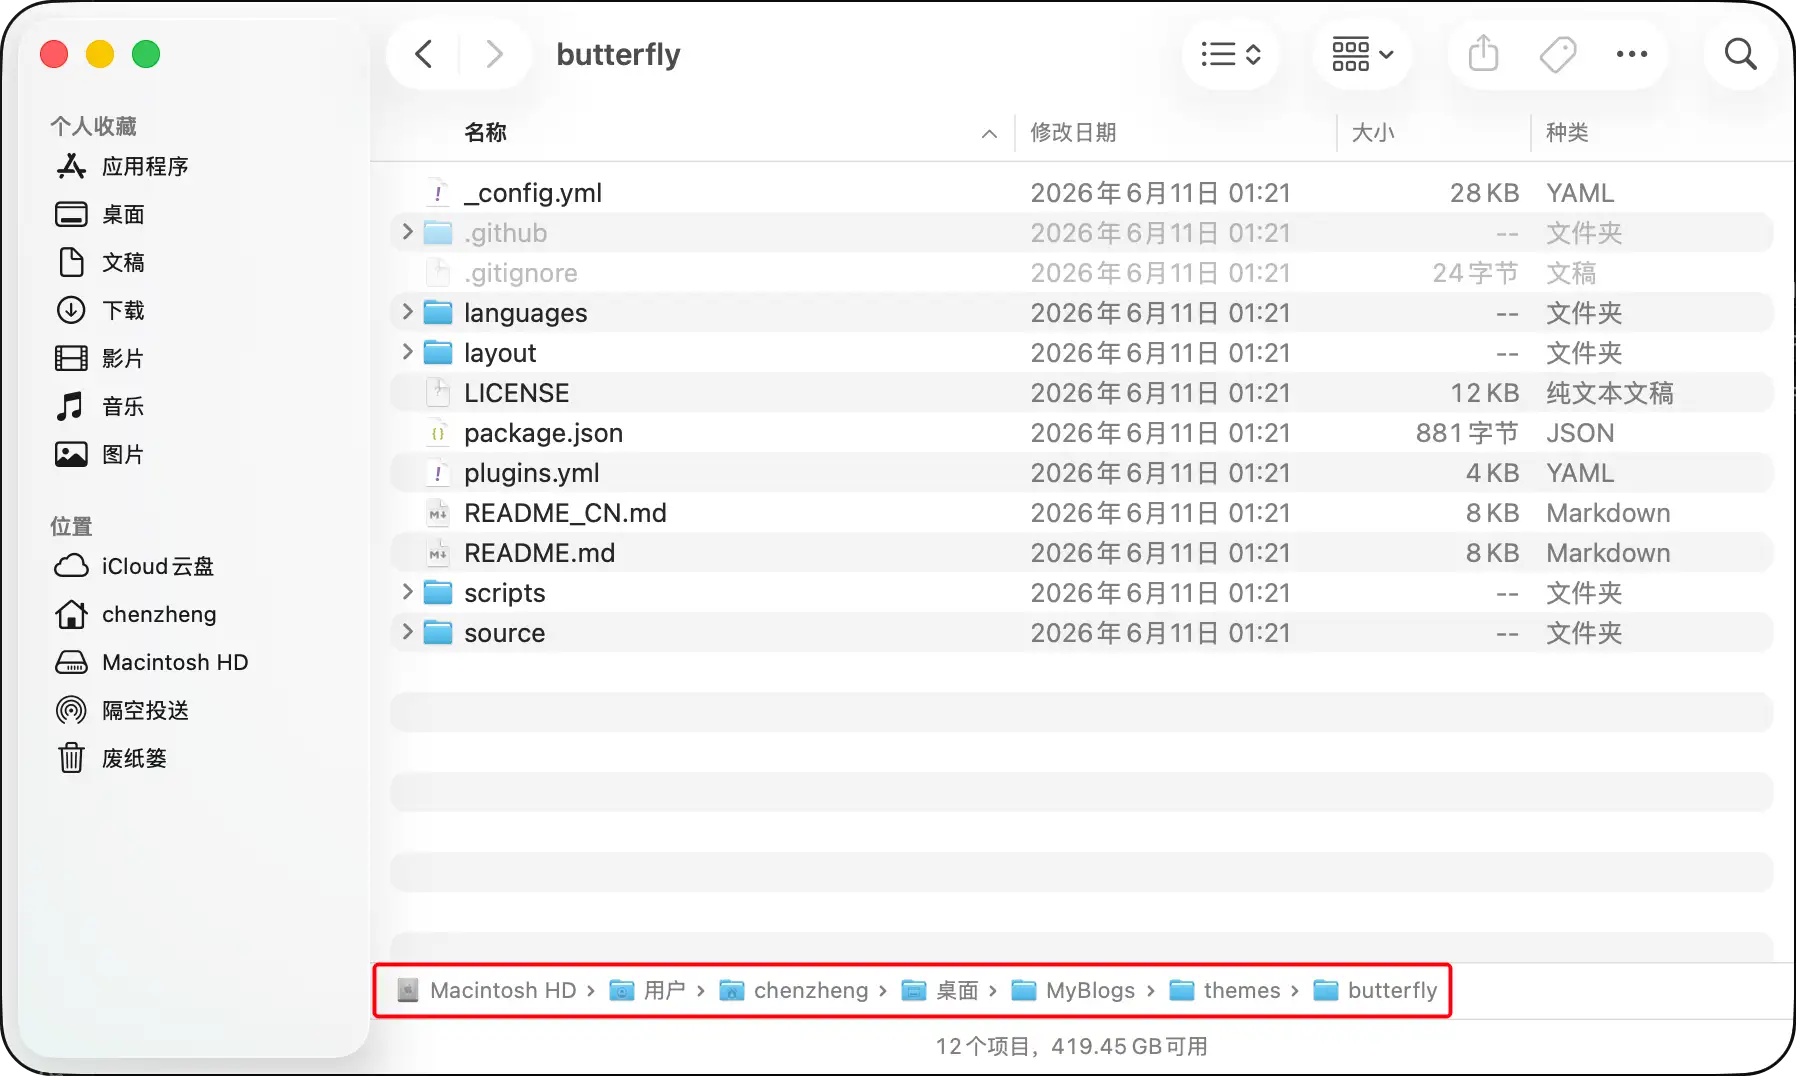
注意:放到本地博客工程 /themes 文件夹中的主题文件夹必须重命名为 butteryfly,后面我会解释为什么!此外,本地博客根目录下的 /themes 文件夹中原本存在名为.gitkeep的文件,这是为了保证空文件夹 /themes 能被 Git 管理,因为此时这个文件夹已经不是空的呢,所以.gitkeep文件也可以删除了!

第二步:修改站点配置文件

在本地博客工程根目录中找到并打开_config.yml文件,在其中找到theme,进行如下操作并保存:

第三步:安装插件

Butterfly 依赖模板引擎 pug 和 CSS 预处理语言 stylus,而 Hexo 程序本身自带 stylus:

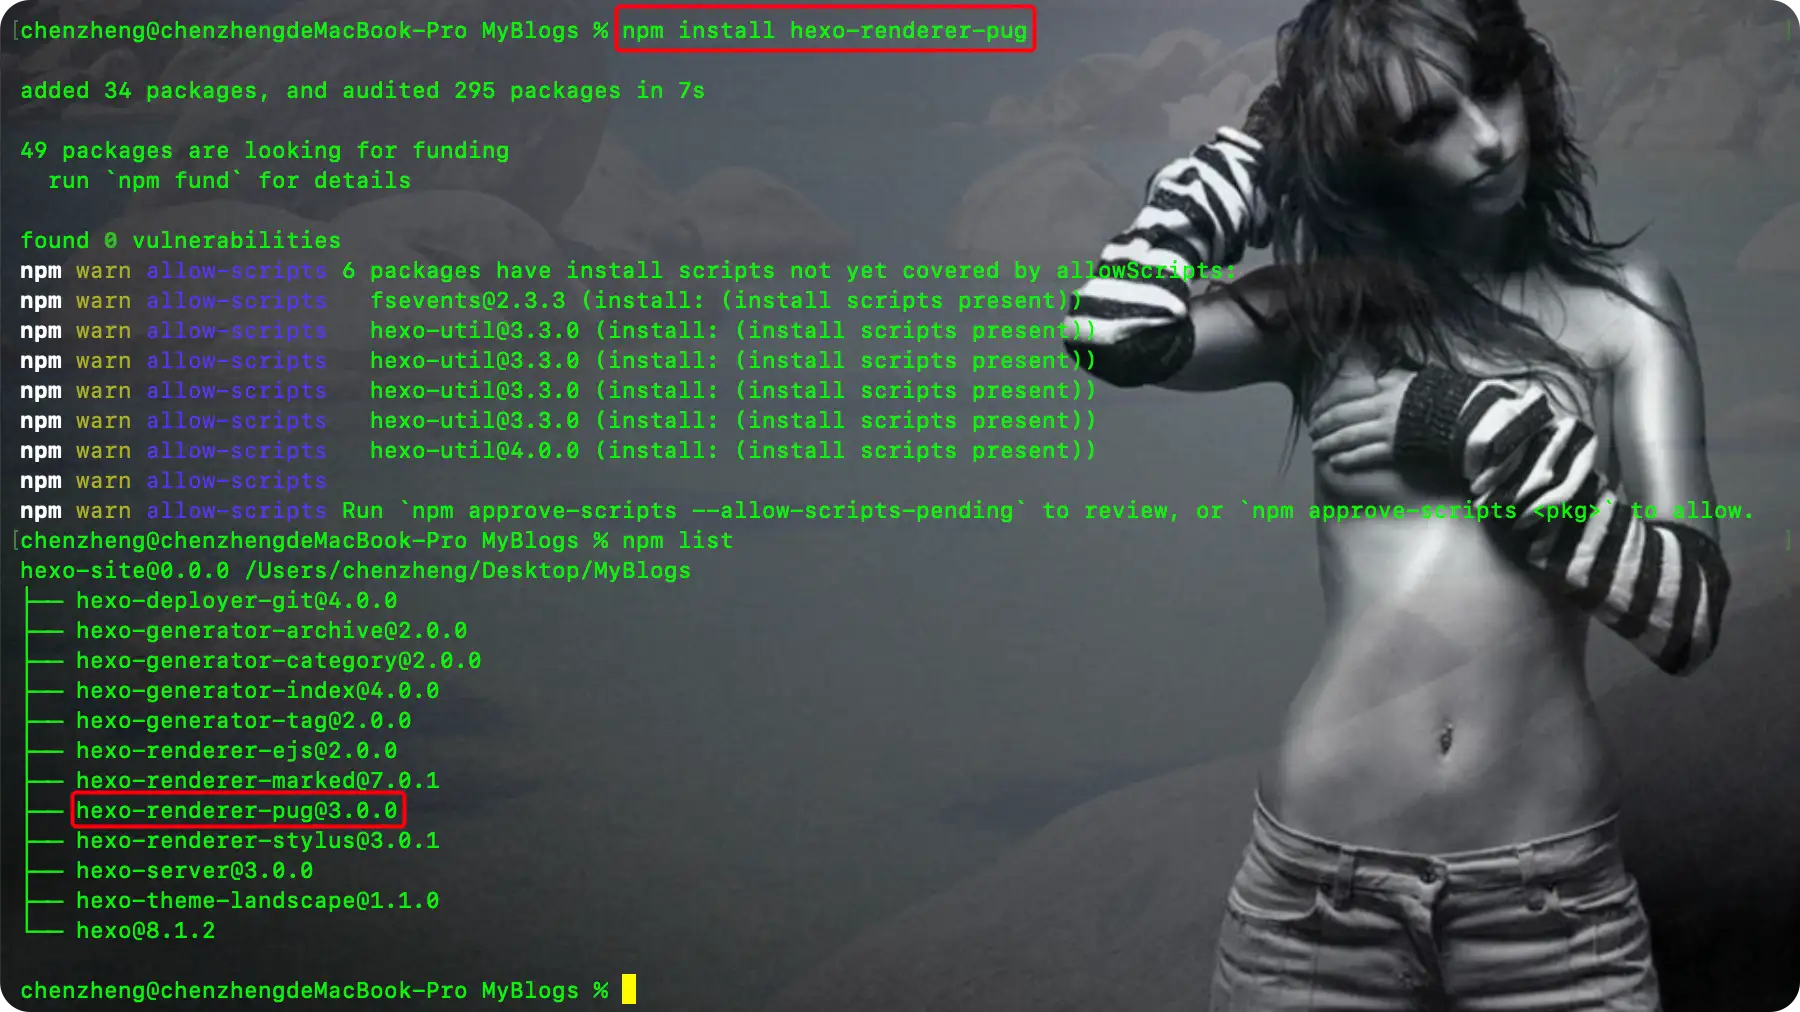
所以只需要安装 pug,打开终端并切换到本地博客工程目录下,执行如下安装命令,安装后查看是否安装成功:

1
npm install hexo-renderer-pug

第四步:清理缓存

修改了博客根目录下的_config.yml文件,要想修改生效,就必须先清理缓存!

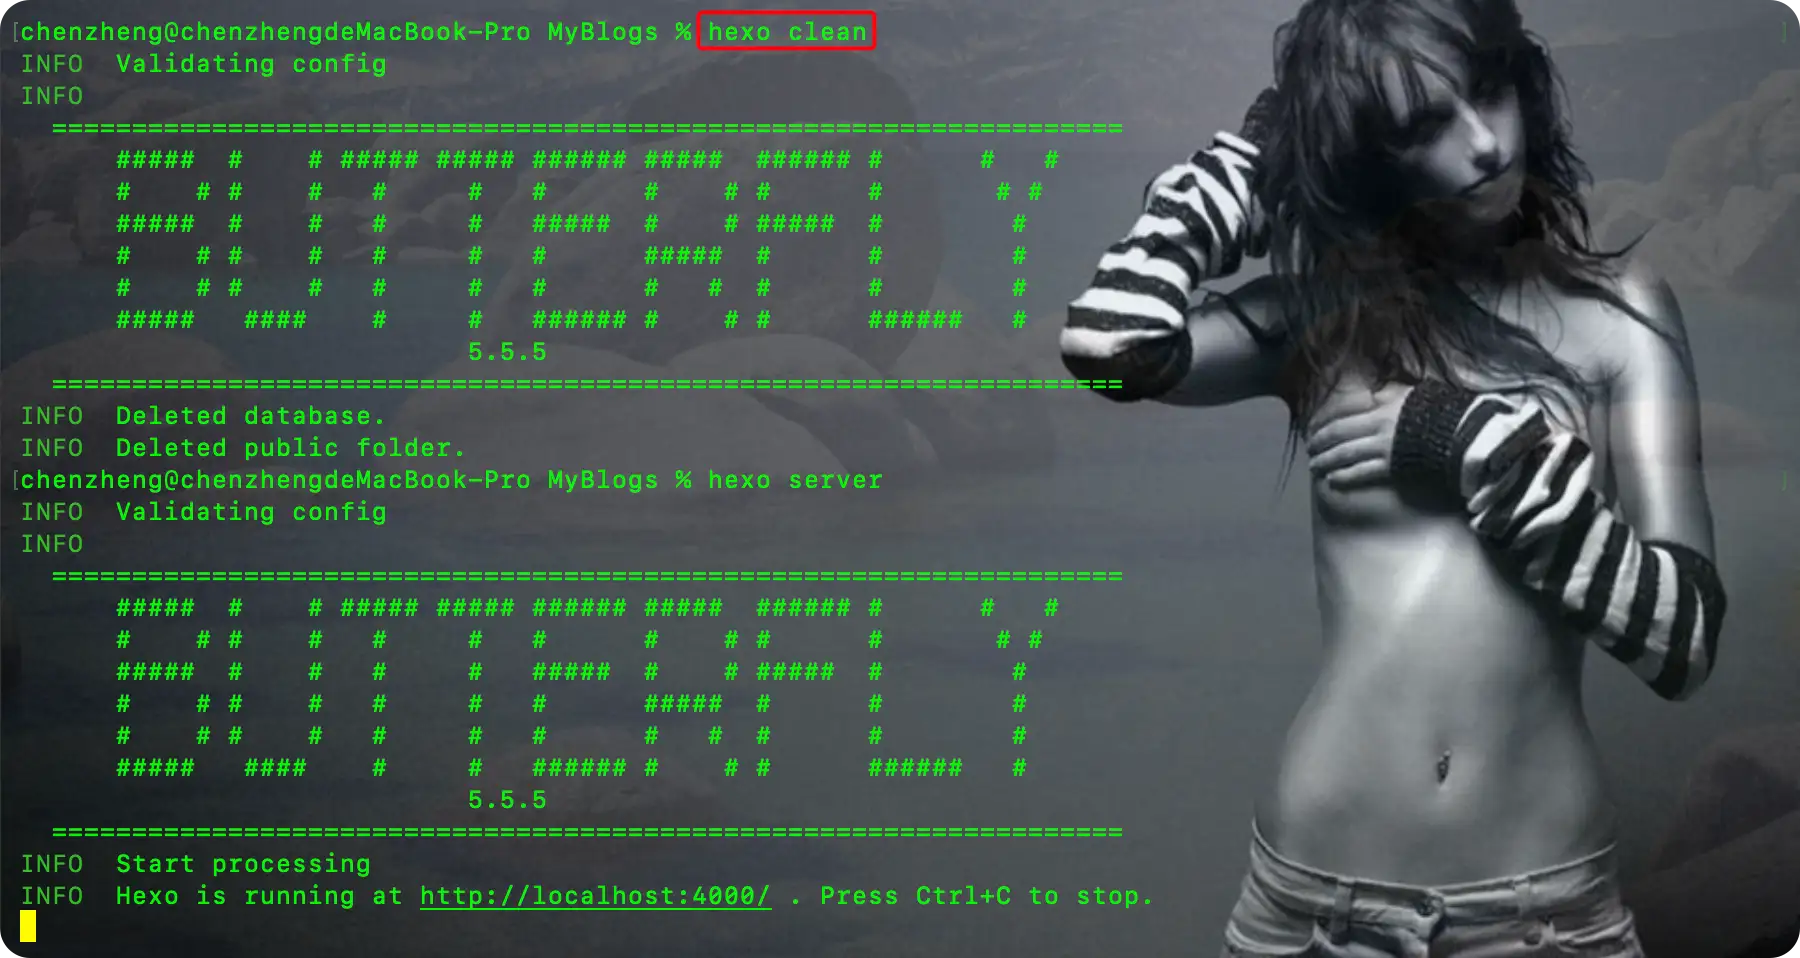
打开终端切换到本地博客工程目录下先后执行如下两条命令:

1
2
hexo clean
hexo server

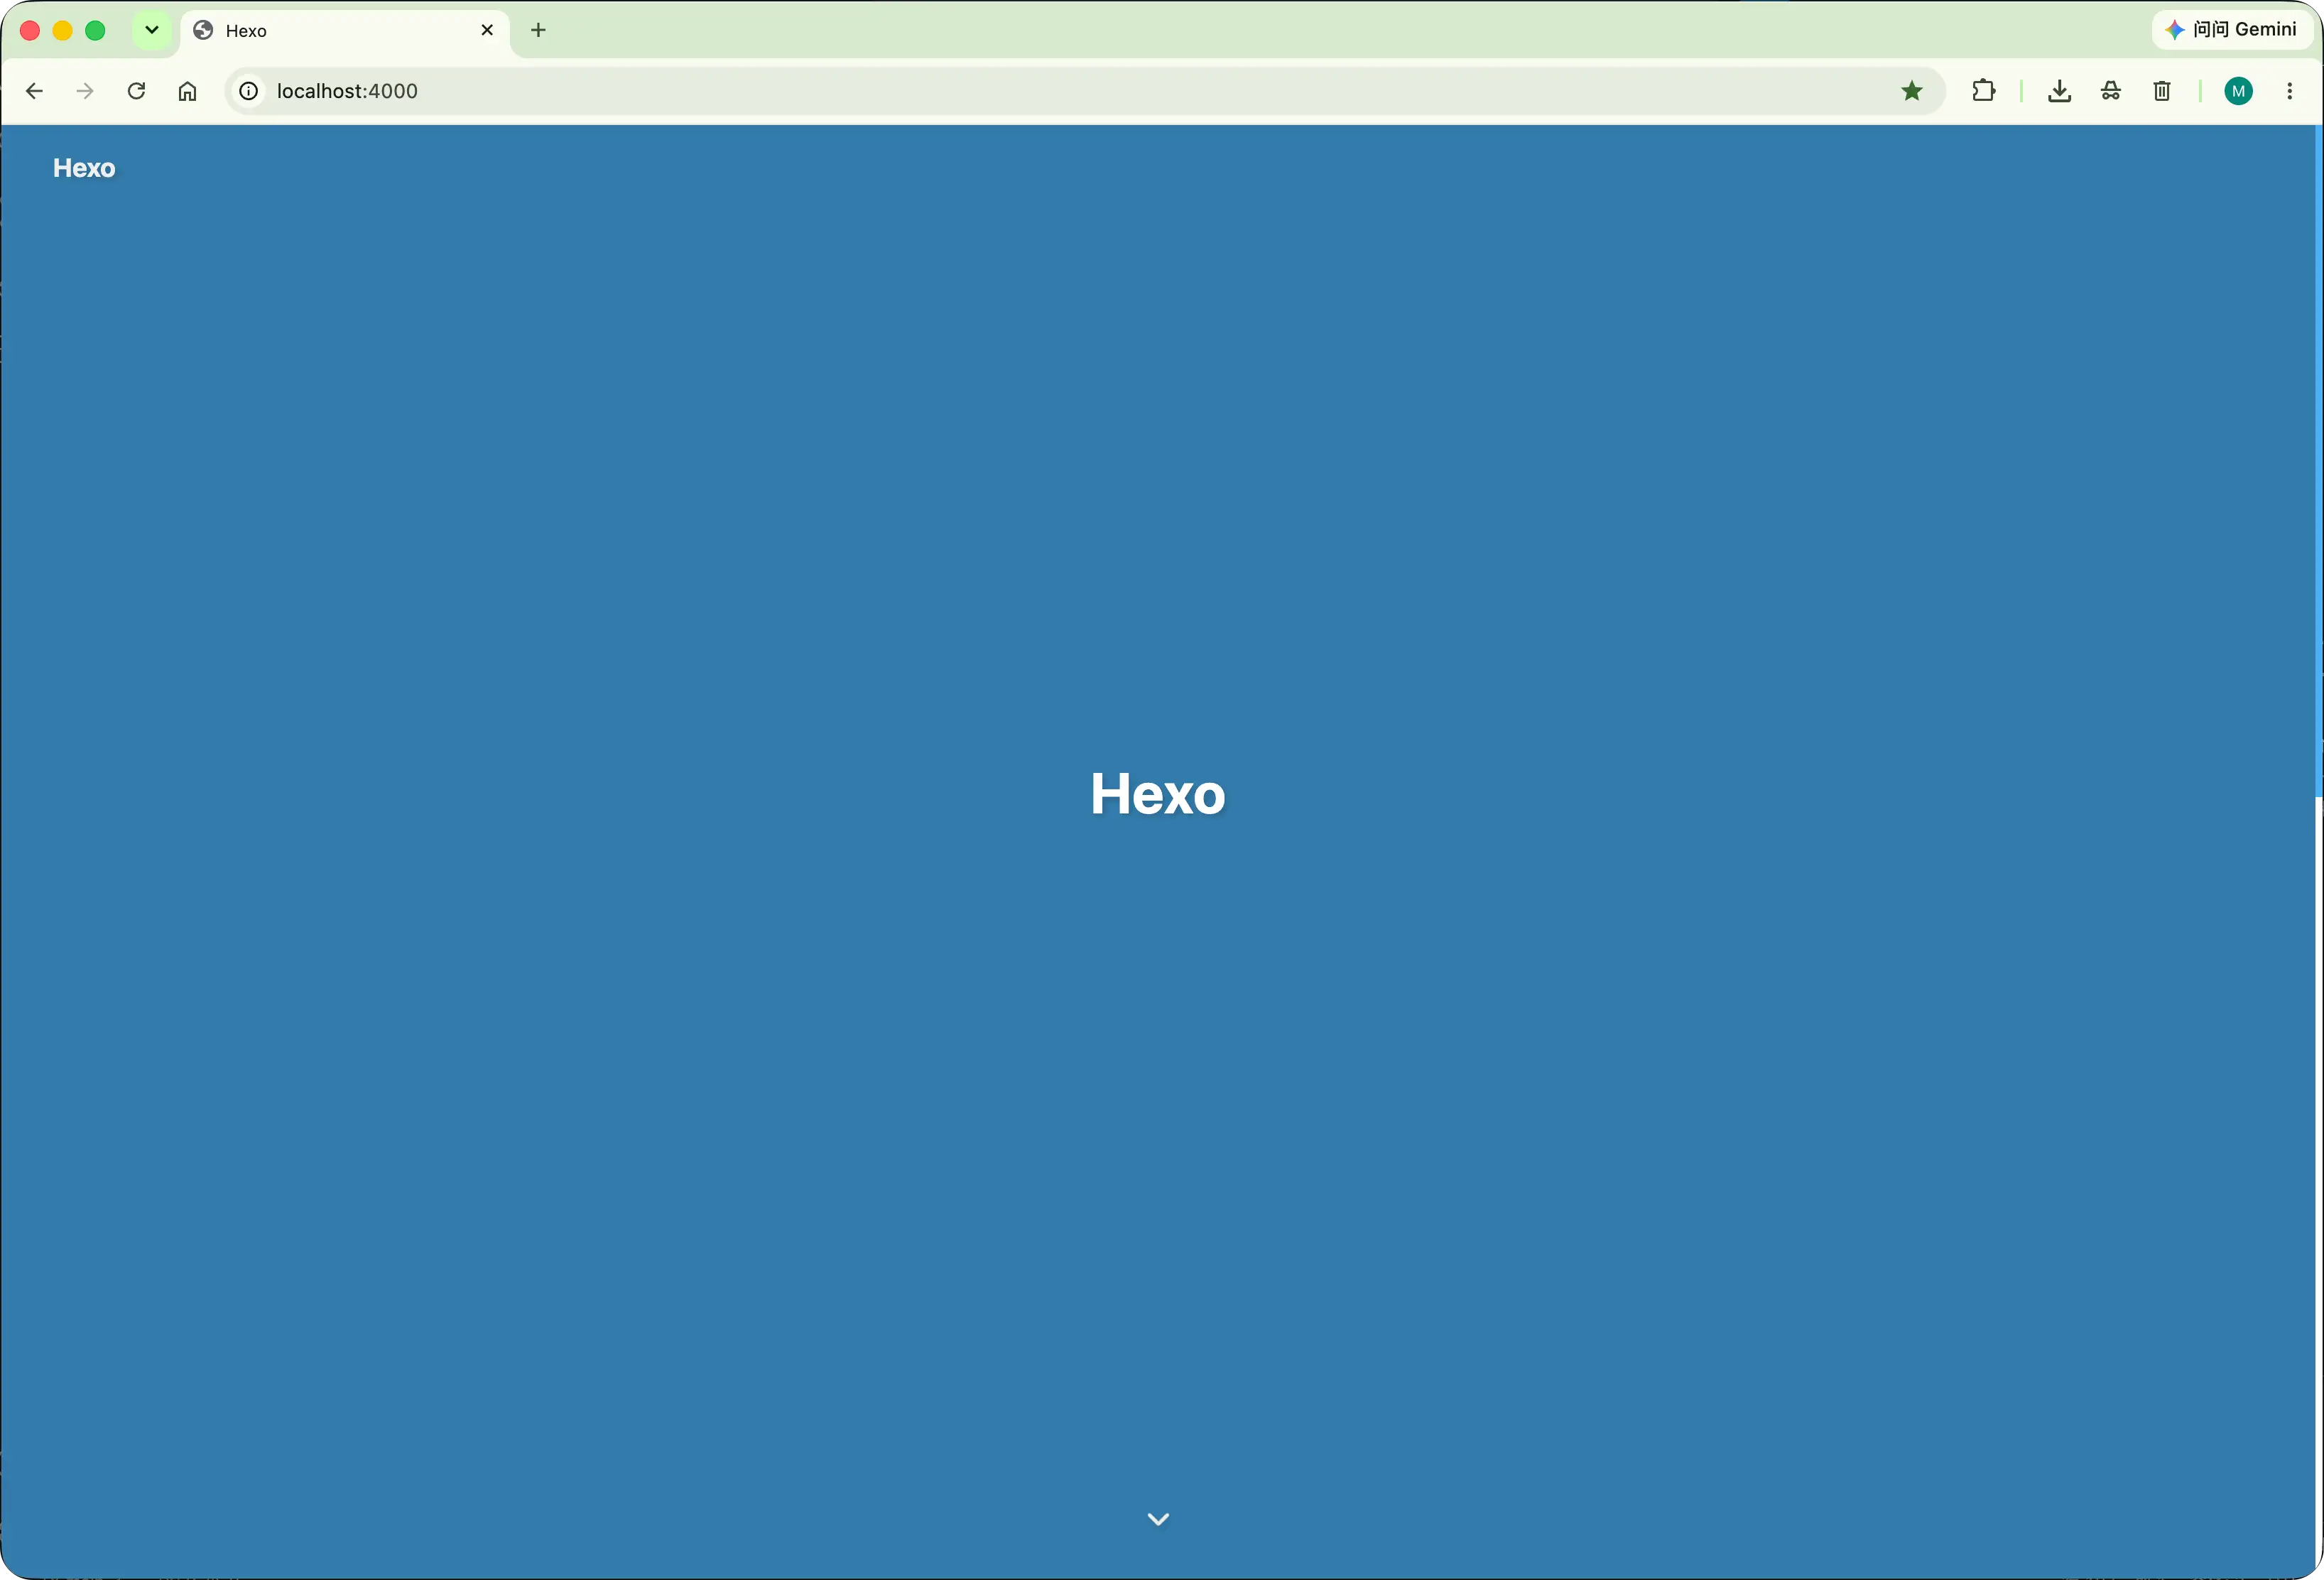
执行完以后,打开浏览器访问http://localhost:4000/,可见效果:
2.3:配置文件

更换主题后,整个博客工程中就存在了两个名为_config.yml的配置文件,第一个是在本地博客工程根目录下的,另一个是在于主题根目录下的。在本地使用hexo generate生成静态博客文件时,会获取这两个配置文件中的内容作为关键信息,在对博客主题进行修改优化的时候,会频繁地用到这两个文件,所以一定要区分清楚。习惯上,我们会将前者称为站点配置文件,将后者称为主题配置文件

然而 Butterfly 主题有一个更好的处理,Butterfly 的官方文档上写的很清楚:
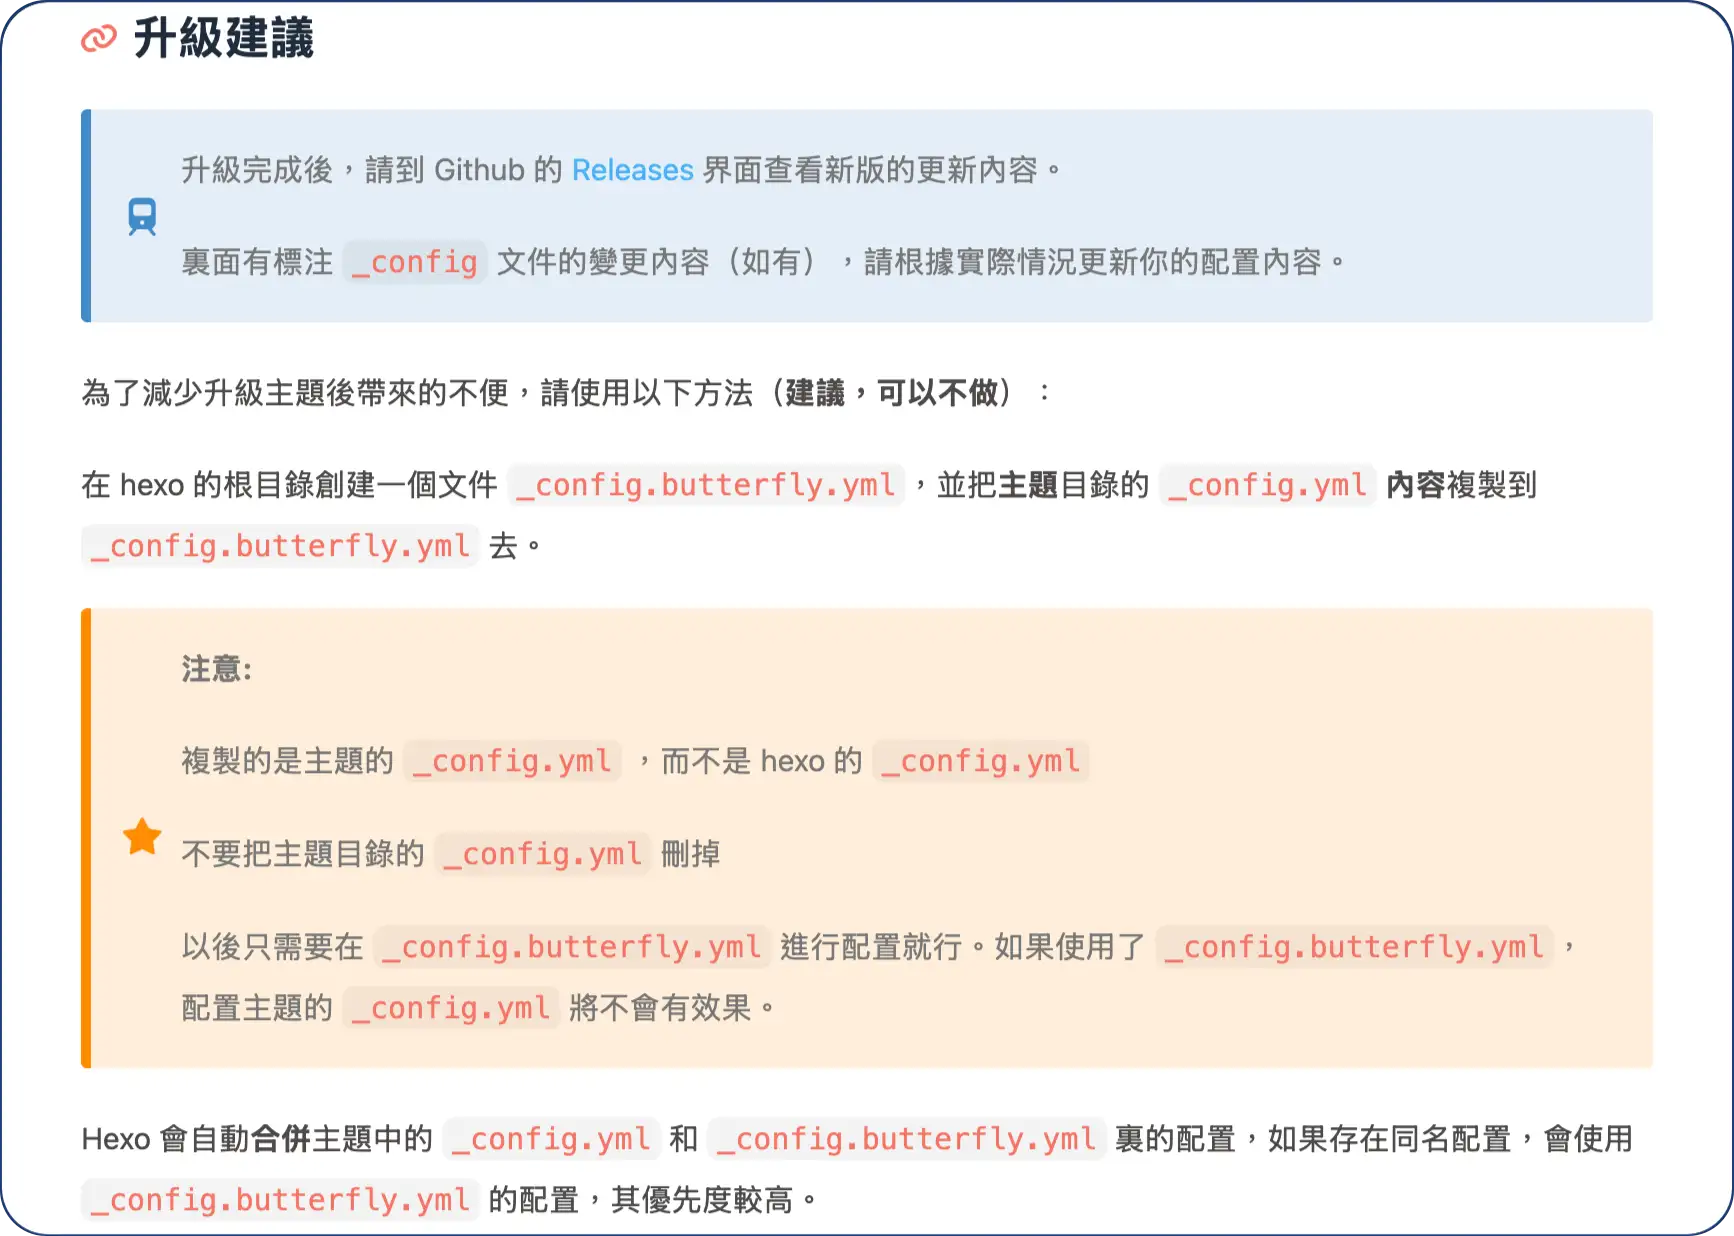
如果采取官网建议的话,从此博客根目录下就有了两个配置文件:_config.yml_config.butterfly.yml但是要注意:在本文的 2.2 中,假如你放到博客工程/themes中的主题文件夹没有重命名为butterfly的话,那么此时在这里创建的名为_config.butterfly.yml的配置文件就不会生效!

从现在开始:

  • 博客工程根目录下的_config.yml文件是用来修改整个 Hexo 网站的样式行为的,称之为站点配置文件
  • 博客工程根目录下的_config.butterfly.yml文件是用来修改主题的样式行为的,称之为主题配置文件
  • 博客工程根目录下的_config.landscape.yml文件时用来修改默认主题样式的,可以删除了;

通常,修改了站点配置文件后,要清理缓存后重新生成静态资源(或预览),修改的内容才会生效!!!

第三节:基本配置

Butterfly 主题的配置文件很长,有一千行,基本上所有的配置都可以在主题配置文件中找到。

3.01:Front-matter

Front-matter 是 Hexo 中的概念,它是文件最上方以 --- 分隔的区域,用于指定个别文件的变量!在写博客和主题基本设置之前,一定要先学习这部分内容!

  • 首先,Hexo 中预置的 Front-matter,参看官网的这篇博文
  • 其次,Butterfly 在 Hexo 的基础上还定义了一些 Front-matter,参看 Butterfly 官方的这篇博文

3.02:网站默认语言

Hexo 程序默认的网站语言是英文(en),Butterfly 主题支持如下六种:

  • default(en)
  • zh-CN(简体中文)
  • zh-TW(台湾繁体中文)
  • zh-HK(香港繁体中文)
  • ja(日语)
  • ko(韩语)

要想修改网站默认显示语言为简体中文,只需要修改站点配置文件:

3.03:网站基本资料

在站点配置文件_config.ymlSite处可以配置网站的基本资料,包括如下内容:

参数 描述
title 网站标题
subtitle 副标题,在浏览器标签中跟在网站标题后面展示
description 网站描述
keywords 网站的关键词,支持多个关键词
author 网站作者,修改为自己的名字
language 网站使用的语言。使用2个字母的ISO-639-1代码,或它的变体,默认为en。参考主题来设置。
timezone 网站时区。Hexo 默认使用你电脑的时区,请参考时区列表进行设置,如 America/New_York, Japan, 和 UTC 。一般的,对于中国大陆地区可以使用 Asia/Shanghai

比如我的配置如下:

1
2
3
4
5
6
7
8
# Site
title: 繁体猴の客栈
subtitle: ''
description: '专注网络技术学习,记录建站踩坑经验,顺带记录日常碎片与生活感悟'
keywords: [HTML, CSS, JavaScript, Java, Linux, Python, Mac, macOS, shell]
author: Chen Zheng
language: zh-CN
timezone: 'Asia/Shanghai'

3.04:导航栏设置

导航栏可以设置三个参数,分别是:

1
2
3
4
5
6
7
nav:
# Navigation bar logo image
logo:
display_title: true
display_post_title: true
# Whether to fix navigation bar
fixed: false
  • logo:网站的 logo,支持图片,直接填入图片链接即可,相对路径或图片的网络URL都可以;
  • display_title:是否展示网站的标题,默认是展示的;
  • display_post_title:是否在滚动时显示文章标题,默认是展示的;
  • fixed:是否固定导航栏,建议不固定,因为只要鼠标滚轮向上翻动页面,导航栏就会自动展示;

这部分内容可以根据自己的需要和习惯来自行修改,比如我这里就没有进行任何设置!

3.05:导航栏菜单

导航栏还可以展示菜单栏,需要在主题配置文件中打开设置,比如:

1
2
3
4
5
6
7
8
9
10
menu:
Home: / || fas fa-home
Archives: /archives/ || fas fa-archive
Tags: /tags/ || fas fa-tags
Categories: /categories/ || fas fa-folder-open
List||fas fa-list:
Music: /music/ || fas fa-music
Movie: /movies/ || fas fa-video
Link: /link/ || fas fa-link
About: /about/ || fas fa-heart

这里需要注意两点:

  • 菜单的每个页面路径必须是 /xxx/,后面||分开,然后写图标名,如果不想显示图标,图标名可不写;
  • 若主题版本大于 4.0.0,可以直接在子目录里添加hide来隐藏子目录,比如:List||fas fa-list||hide:

这里展示的文字可以自行更改,比如我创建的菜单如下:

1
2
3
4
5
6
7
8
9
10
11
12
13
14
15
16
# Menu 目錄
menu:
首页: / || fas fa-home
文章||fas fa-list:
分类: /categories/ || fas fa-folder-open
标签: /tags/ || fas fa-tags
归档: /archives/ || fas fa-archive
休闲||fas fa-list:
照片展: /gallery/ || fas fa-images
图书馆: /books/ || fas fa-book
电影院: /movies/ || fas fa-video
音乐汇: /music/ || fas fa-music
玩游戏: /games/ || fas fa-gamepad
友链: /link/ || fas fa-link
留言板: /comment/ || fas fa-comment-dots
关于我: /about/ || fas fa-heart

这只是展示在导航栏的菜单,对应的页面还没有(只有 Home 和 Archives 这两个是预置的),在满足主题菜单的配置规则下,我们可以任意组织自己的个性化菜单,最后还要创建对应的页面,如何创建可以查看本文 3.06!

3.06:创建页面

主题中给定的菜单目录是可以自己定义的,根据自己的需要设置一级目录和二级目录,这里只是配置了菜单,菜单对应的这些页面还不存在(除首页和归档页是 Hexo 自带的),需要我们自己创建!

第一类:创建菜单中的页面

比如下面创建一个分类页:

  1. 打开终端,切换到博客工程根目录下,执行如下命令

    1
    hexo new page categories

    执行成功以后,就会在博客根目录下的/source目录下生成一个名为categories的子文件夹,文件夹中生成了一个名为index.md的文件,这个文件就是最终的分类页!

  2. 然后在生成的/source/categories/index.md中的 Front-matter 中添加type: "categories"

    1
    2
    3
    4
    5
    ---
    title: categories
    date: 2023-09-01 00:00:00
    type: "categories"
    ---

注意titledate是自动生成的,我们可以任意修改这两项的值,但是必须添加type: "categories",这样主题才能按照设定的 categories 布局来渲染这个页面!同理,对于其他的页面也要按照这种方式来生成,只是 Front-matter 中的type配置项要设置为相应的值(分类、标签、友情链接和 404 页这四个页面必须设置,其他页面不用设置,因为主题没有为其他页面设置相应的布局)!

友情提示:实际上,使用hexo new page命令来生成目录和页面不是必须的,也可以直接在资源管理器或访达中手动创建这些文件夹和文件并手动编辑!如果想要查看详细信息,可参考 Butterfly 的官方文档:传送门

第二类:创建404页面

404 页面不需要创建,主题内置了一个404页面,只需要在主题配置文件中打开设置即可:

1
2
3
4
5
# A simple 404 page
error_404:
enable: true
subtitle: '您访问的页面找不到了~'
background: /img/error-page.png

第三类:友链页的信息

友链页展示的信息,要在博客根目录下的/source/_data/下创建名为link.yml的文件,并在其中按如下格式添加:

1
2
3
4
5
6
7
8
9
10
11
12
13
14
15
16
17
18
19
20
21
22
23
24
25
26
27
28
29
30
31
- class_name: 友情链接
class_desc: 一些优秀的博客网站
link_list:
- name: 张洪Heo
link: https://blog.zhheo.com/
avatar: https://img02.anheyu.com/adminuploads/1/2022/09/02/6311fc38f1465.webp
descr: 一个真正的大佬
- name: 安知鱼
link: https://blog.anheyu.com/
avatar: https://npm.elemecdn.com/anzhiyu-blog-static@1.0.4/img/avatar.jpg
descr: 极致的Butterfly
- name: Leonus
link: https://blog.leonus.cn/
avatar: https://q1.qlogo.cn/g?b=qq&nk=990320751&s=5
descr: 优秀的Butterfly

- class_name: 技术站点
class_desc: 一些优秀的技术站点
link_list:
- name: Hexo
link: https://hexo.io/zh-cn/
avatar: https://d33wubrfki0l68.cloudfront.net/6657ba50e702d84afb32fe846bed54fba1a77add/827ae/logo.svg
descr: Hexo官方网站
- name: Butterfly
link: https://butterfly.js.org
avatar: https://butterfly.js.org/img/avatar.png
descr: 美观且强大的Hexo主题
- name: Pug
link: https://www.pugjs.cn/
avatar: https://www.pugjs.cn/img/logo.png
descr: Pug模板引擎中文文档

3.07:网站域名

在设置之前,网站中的文章链接或者其他部分展示网站域名的地方都是默认的http://example.com,比如:

网站的域名是在站点配置文件_config.yml中配置的,只需要将url的值改为自己的域名即可:

3.08:永久链接

Hexo 会给每一篇博文生成一个永久性链接,默认情况下,链接的内容由博文发布时间和博文文件名称组成的。

常规优化:常规做法是安装 hexo-permalink-pinyin 插件,它可以将博客文件名称中的中文转为拼音,各个汉子之间用符号-来连接,但是如果我们在日常发布中,修改了某篇博客文件中 Front-matter 的时间或者文件名后重新发布,那么原本生成的永久链接就会失效!而且假如博客文件的中文名称很长,那么永久链接就会更长!出于这两点考虑,我选择放弃这种优化方式!

我的做法:我选择使用 hexo-abbrlink 插件来为博文生成永久静态短链接!

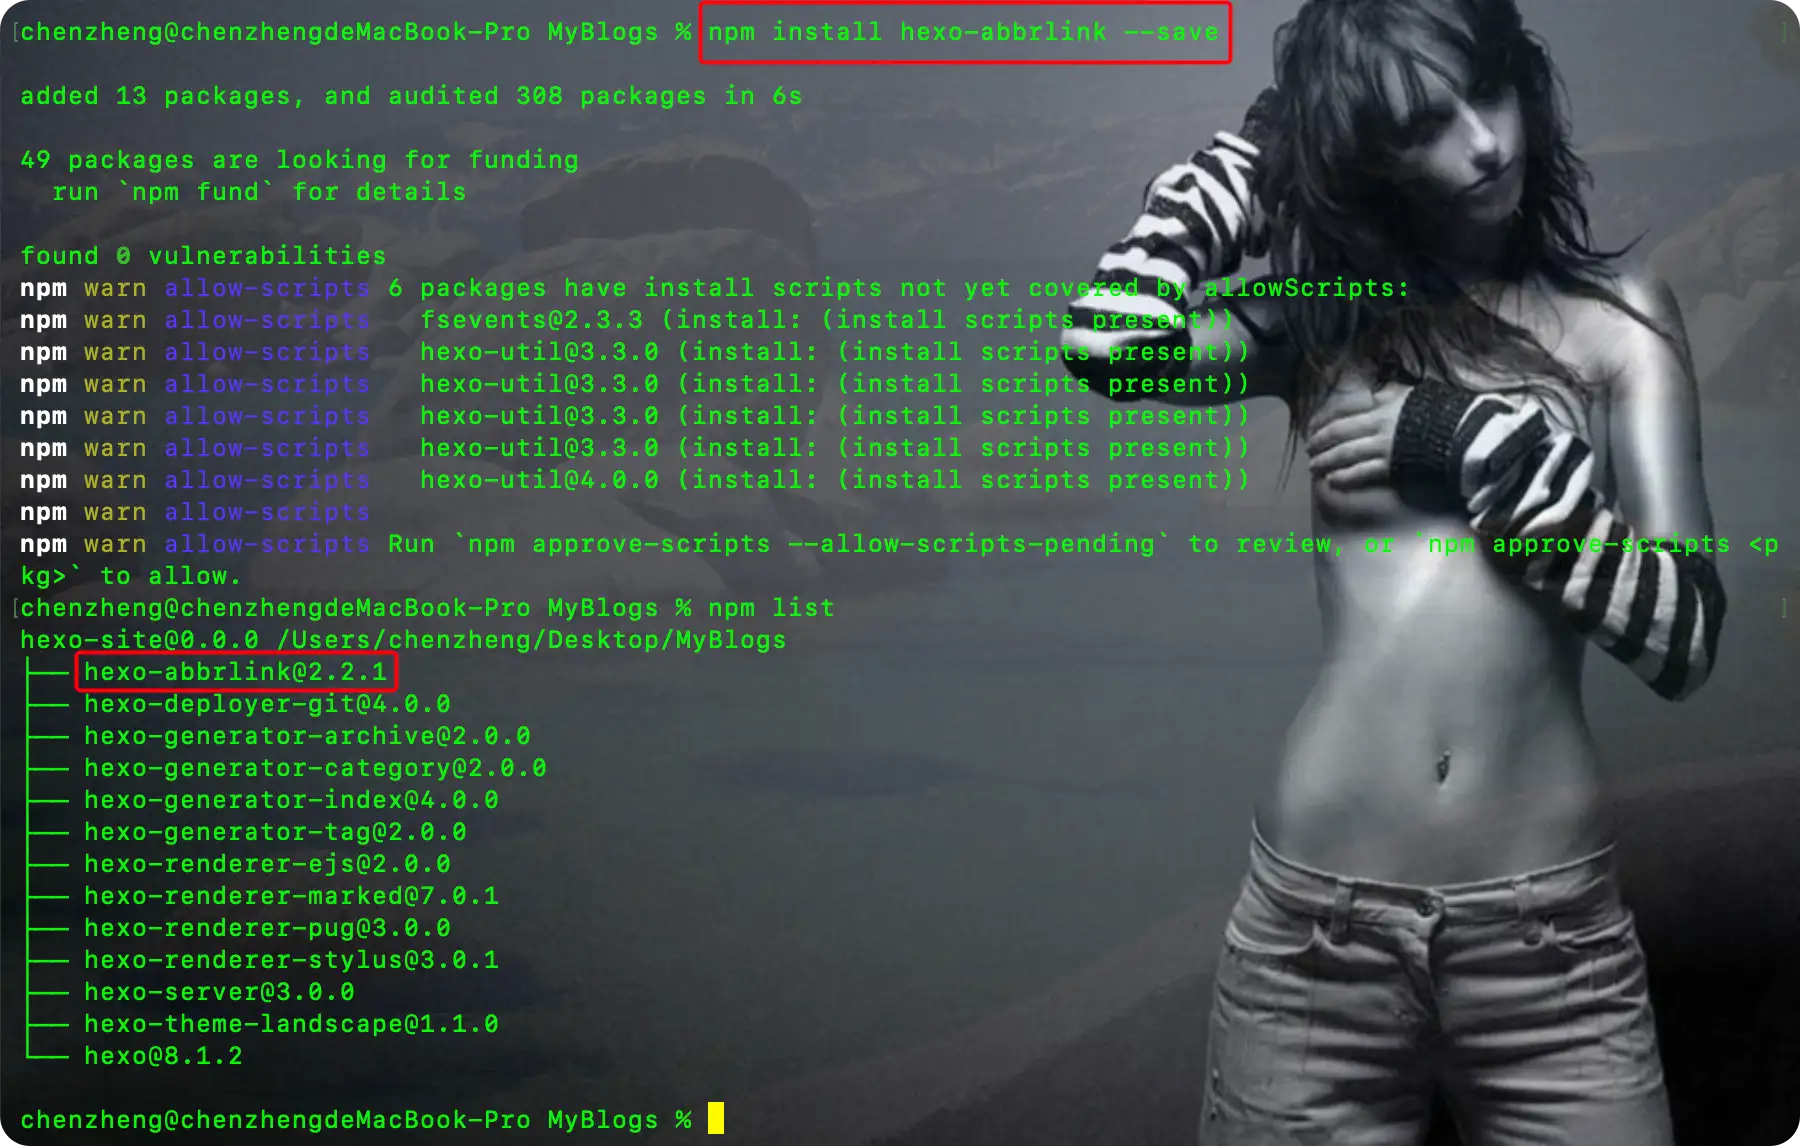
第一步:打开终端,切换到本地博客工程根目录下,执行安装插件的命令

1
npm install hexo-abbrlink --save

第二步:打开站点配置文件,先找到并修改permalink,并在后面增加abbrlink配置
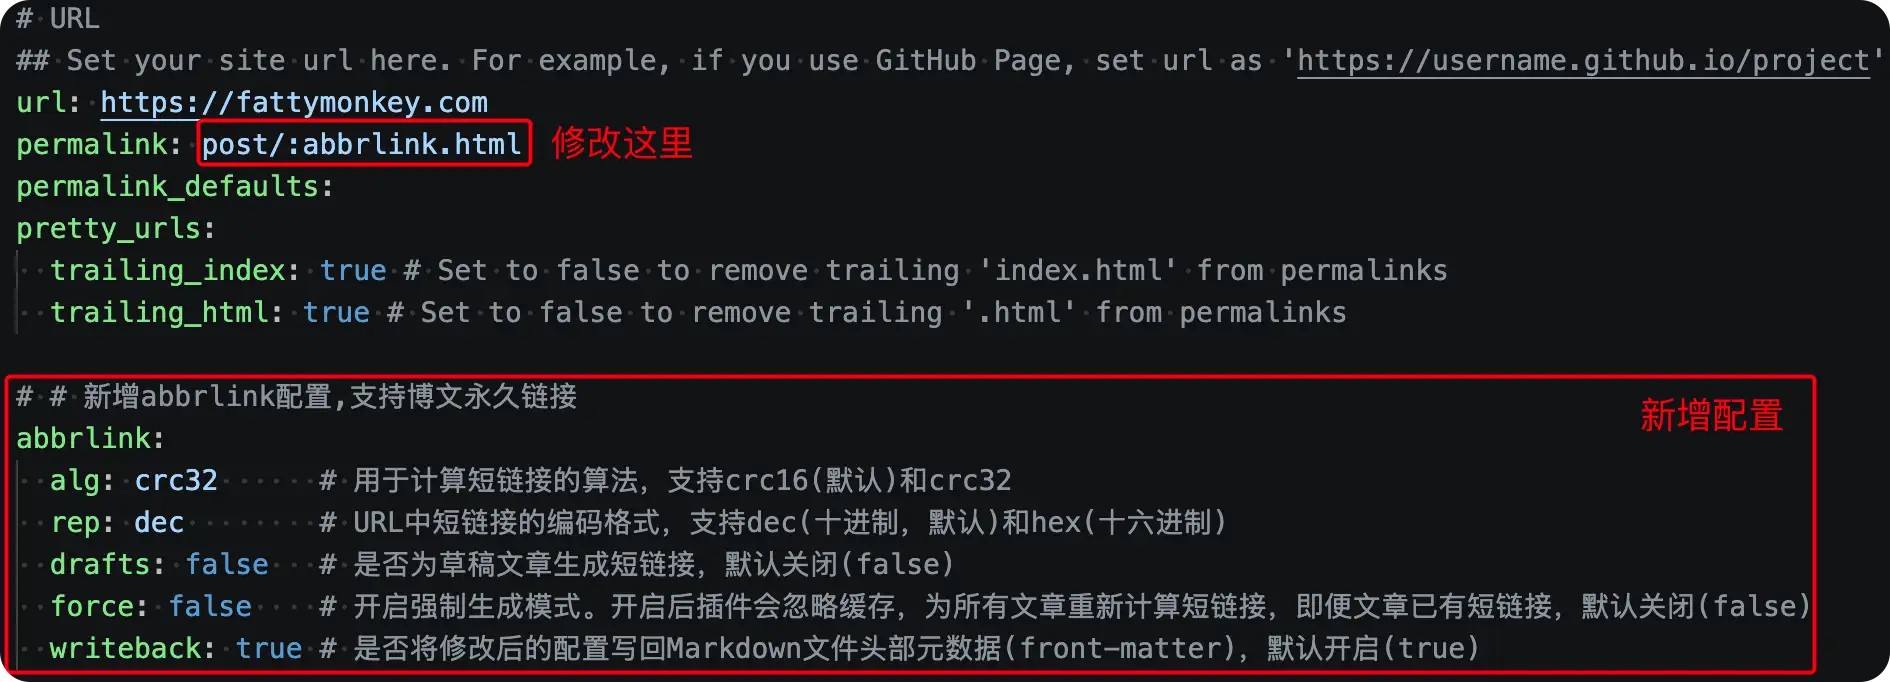
第三步:清理缓存后再执行hexo generate,可见此时生成的博文永久链接为数字类型

此时打开博文的MD文件,可见在 Front-metter 部分自动新增了abbrlink项目:

最后效果

  • 以后,当在_post文件夹中创建一个新的 Markdown 文件或者复制一个 Markdown 文件过来以后,只要执行预览或者生成静态博客文件的命令,就会在 Front-matter 中自动生成abbrlink的配置项;
  • 以后无论是修改博文的文件名还是修改博文的 Front-matter 中的date,只要不改变abbrlink的值,这篇博文的链接就永远不会改变,而且链接的长度不会很长;
  • 而且我们可以在新建文章的时候,直接在 Front-matter 中指定abbrlink的值,只要跟其他文章的abbrlink的值不重复,就不会存在问题(后续即使自动生成的abbrlink也不会跟我们的自己指定的值重复);

3.09:代码高亮

代码相关的设置,参考Butterfly官方文档,官网上写的太清楚了,没有什么坑点,我就不废话了!我这里设置如下:

1
2
3
4
5
6
7
code_blocks:
# Code block theme: darker / pale night / light / ocean / false
theme: darker
macStyle: false
# Code block height limit (unit: px)
height_limit: 140
word_wrap: false

注意:Butterfly 还支持自定义代码块主题,详细教程在官网上也有,参考这里!我暂时选择使用hexo内置的代码高亮。

3.10:社交图标

Butterfly 支持 font-awesome v6 图标,但是社交图标默认是关闭的,需要自己打开。在主题配置文件中开启:

1
2
3
4
5
# Formal:
# icon: link || the description || color
social:
fab fa-github: https://github.com/fattymonkey || Github || '#24292e'
fas fa-envelope: mailto:1185349843@qq.com || Email || '#4a7dbe'

后续我会针对这部分进行魔改,可以查阅我后面的博客。

3.11:页面Meta

所谓的页面 Meta 设置,就是用来展示文章的相关信息的,这个配置比较简单,我的配置如下:

1
2
3
4
5
6
7
8
9
10
11
12
13
14
15
16
17
# 页面Meta设置
post_meta:
# 在首页上的显示
page:
date_type: both # 日期显示创建日期还是更新日期或都显示,created / updated / both
date_format: date # 显示明确时间还是相对时间,date / relative
categories: true # 是否显示文章分类
tags: false # 是否显示文章标签
label: true # 是否展示文字描述
# 在文章页上的显示
post:
position: left # 显示位置,left / center
date_type: both # 日期显示创建日期还是更新日期或都显示,created / updated / both
date_format: date # 显示明确时间还是相对时间,date / relative
categories: true # 是否显示文章分类
tags: true # 是否显示文章标签
label: true # 是否展示文字描述

第四节:图片设置

在 Butterfly 主题中,有很多类背景图片,这些背景图片都可以在主题配置文件中进行配置!第一次设置的时候会挺迷茫的,因为和图片相关的配置项太多了:

1
2
3
4
5
6
7
8
9
10
11
12
13
14
15
16
17
18
19
20
21
22
23
24
25
26
27
28
29
30
31
32
33
34
35
36
37
38
39
40
41
42
43
44
45
46
47
48
49
50
51
52
53
54
55
56
57
58
59
60
61
favicon: /img/favicon.png

avatar:
img: /img/butterfly-icon.png
effect: false

# Disable all banner images
disable_top_img: false

# If the banner of page not setting, it will show the default_top_img
default_top_img:

# The banner image of index page
index_img:

# The banner image of archive page
archive_img:

# Note: tag page, not tags page
tag_img:

# The banner image of tag page, you can set the banner image for each tag
# Format:
# - tag name: xxxxx
tag_per_img:

# Note: category page, not categories page
category_img:

# The banner image of category page, you can set the banner image for each category
# Format:
# - category name: xxxxx
category_per_img:

# The background image of footer
footer_img: false

# Website Background
# Can set it to color, image URL or an array containing colors and/or image URLs
# If an array is provided, a random background will be selected from the array on each load
background:

cover:
# Disable the cover or not
index_enable: true
aside_enable: true
archives_enable: true
# When cover is not set, the default cover is displayed
default_cover:
# - xxx.jpg

# Replace Broken Images
error_img:
flink: /img/friend_404.gif
post_page: /img/404.jpg

# A simple 404 page
error_404:
enable: false
subtitle: 'Page Not Found'
background: /img/error-page.png

4.01:网站图标

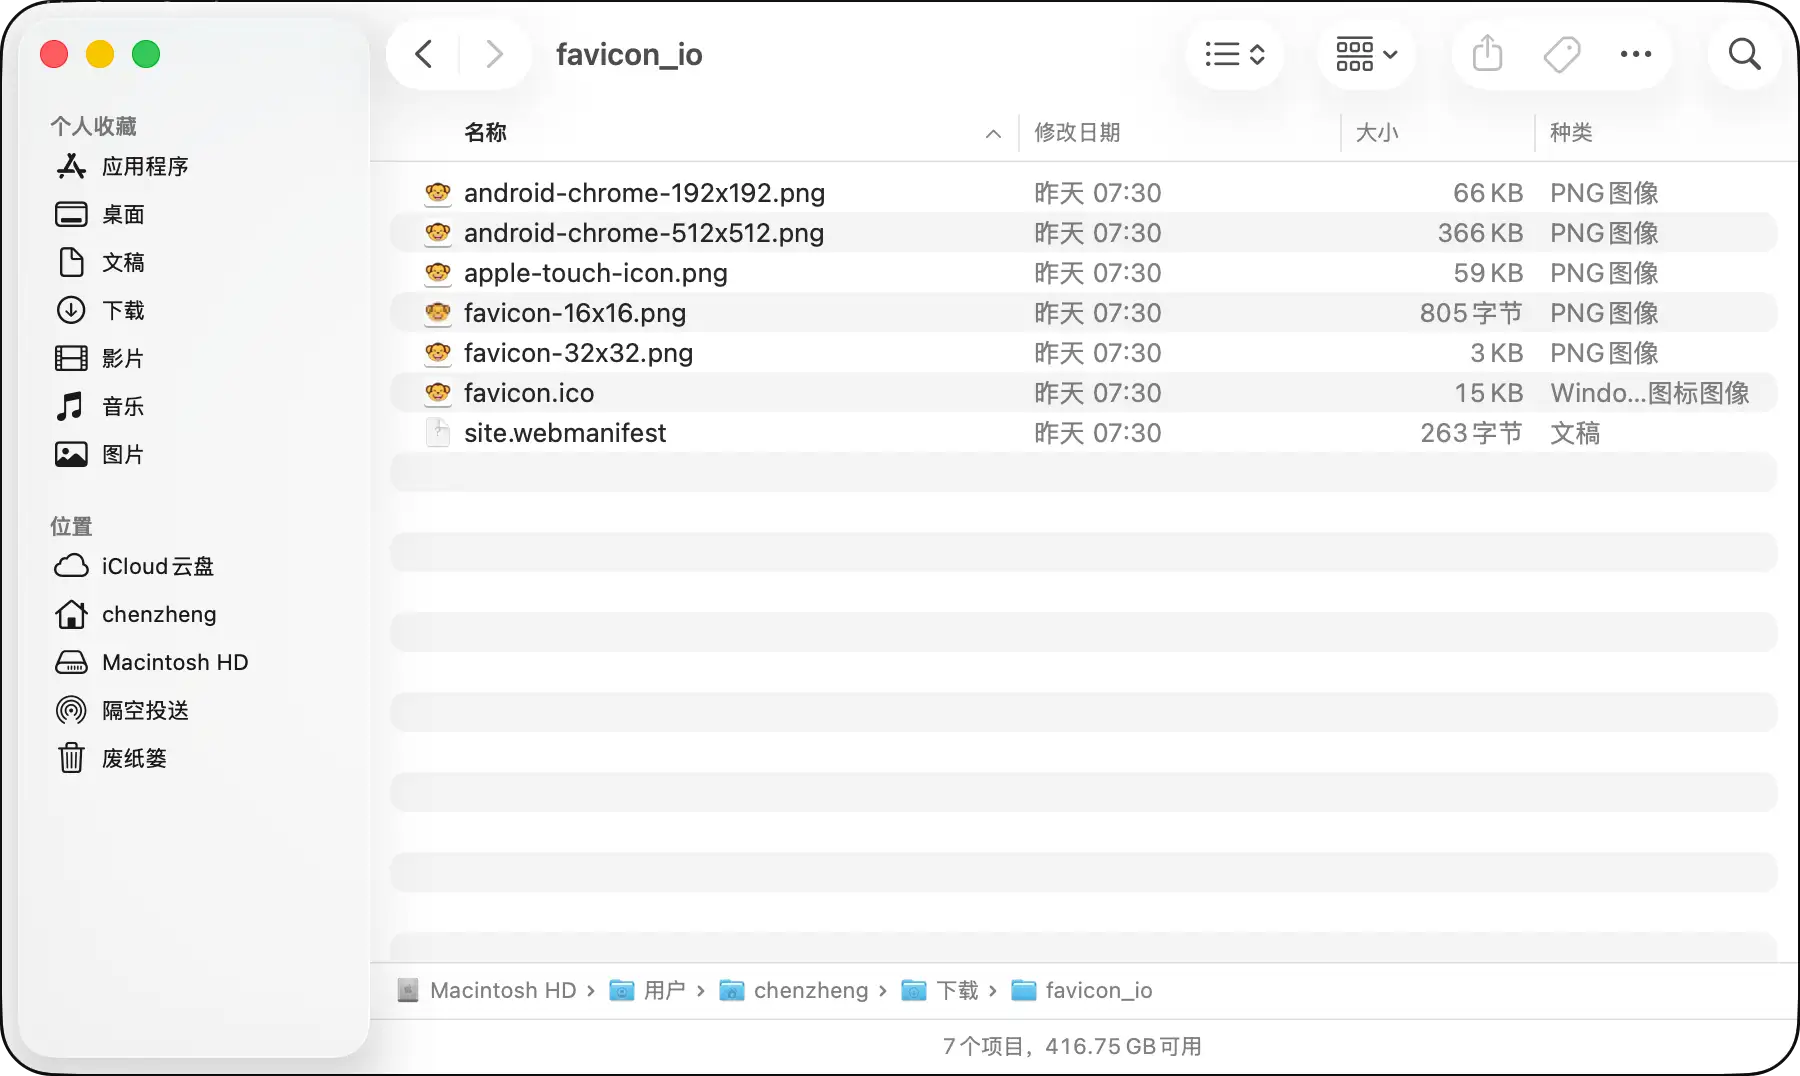
第一步,在 favicon.io 中制作网站图标文件:

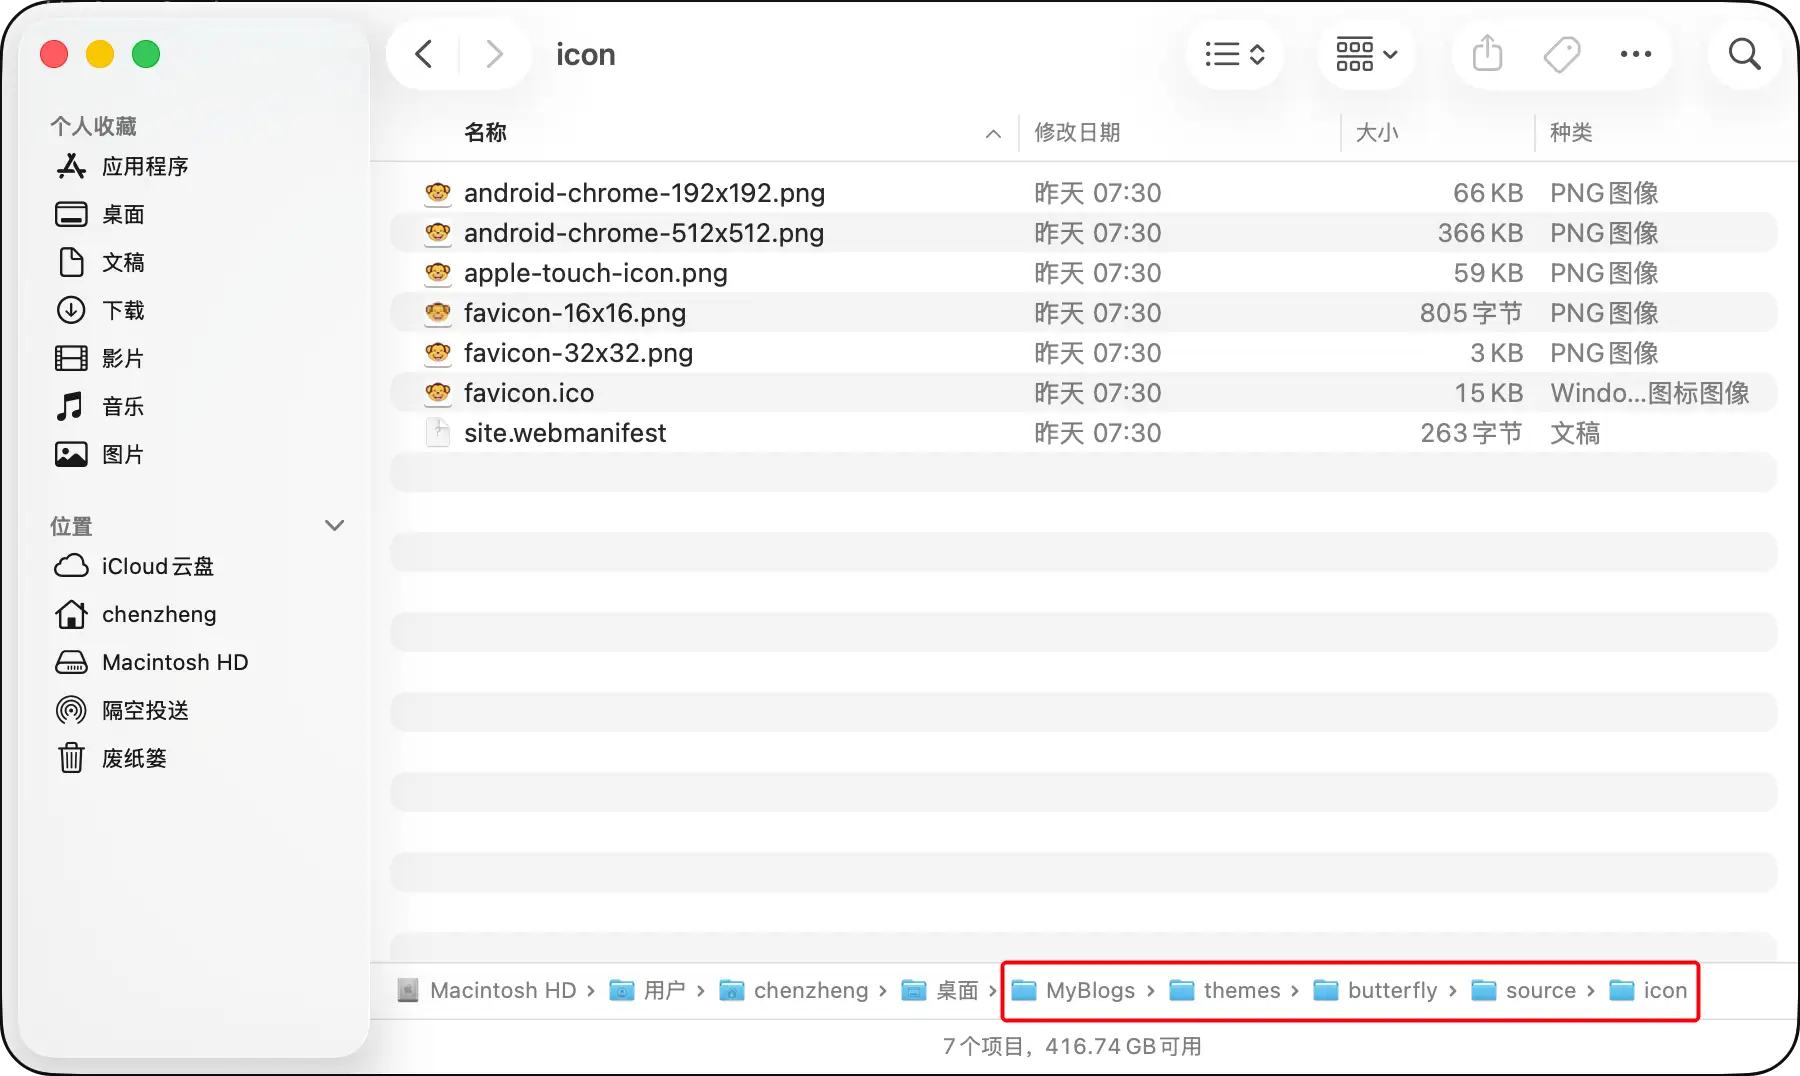
第二步,在主题根目录下的 source 目录下新建名为 icon 的文件夹,并将制作好的网站图标文件都放进去:
第三步,打开主题根目录下的 layout/includes/head.pug 文件,找到如下位置:

1
2
!=favicon_tag(theme.favicon || config.favicon)
link(rel="canonical" href=urlNoIndex(null,config.pretty_urls.trailing_index,config.pretty_urls.trailing_html))

在这两行中间添加如下内容:

1
2
3
4
5
6
7
8
// 自定义多尺寸站点图标(硬编码方式,不用inject方式)
link(rel="icon", type="image/png", sizes="16x16", href="/icon/favicon-16x16.png")
link(rel="icon", type="image/png", sizes="32x32", href="/icon/favicon-32x32.png")
link(rel="apple-touch-icon", sizes="180x180", href="/icon/apple-touch-icon.png")
link(rel="icon", type="image/png", sizes="192x192", href="/icon/android-chrome-192x192.png")
link(rel="icon", type="image/png", sizes="512x512", href="/icon/android-chrome-512x512.png")
link(rel="manifest", href="/icon/site.webmanifest")
meta(name="theme-color", content="#ffffff")

第四步,打开 source/icon/site.webmanifest 文件,将把里面icons下的src全部加上 /icon/ 前缀:

1
{"name":"","short_name":"","icons":[{"src":"/icon/android-chrome-192x192.png","sizes":"192x192","type":"image/png"},{"src":"/icon/android-chrome-512x512.png","sizes":"512x512","type":"image/png"}],"theme_color":"#ffffff","background_color":"#ffffff","display":"standalone"}

第五步,打开主题配置文件,找到 favicon 并进行如下配置:

1
favicon: /icon/favicon.ico

第六步,打开终端切换到博客根目录下,执行如下命令即可预览:

1
hexo clean && hexo server

4.02:头像

第一步:把自己想用的头像放到主题根目录下的 /source/img 中:
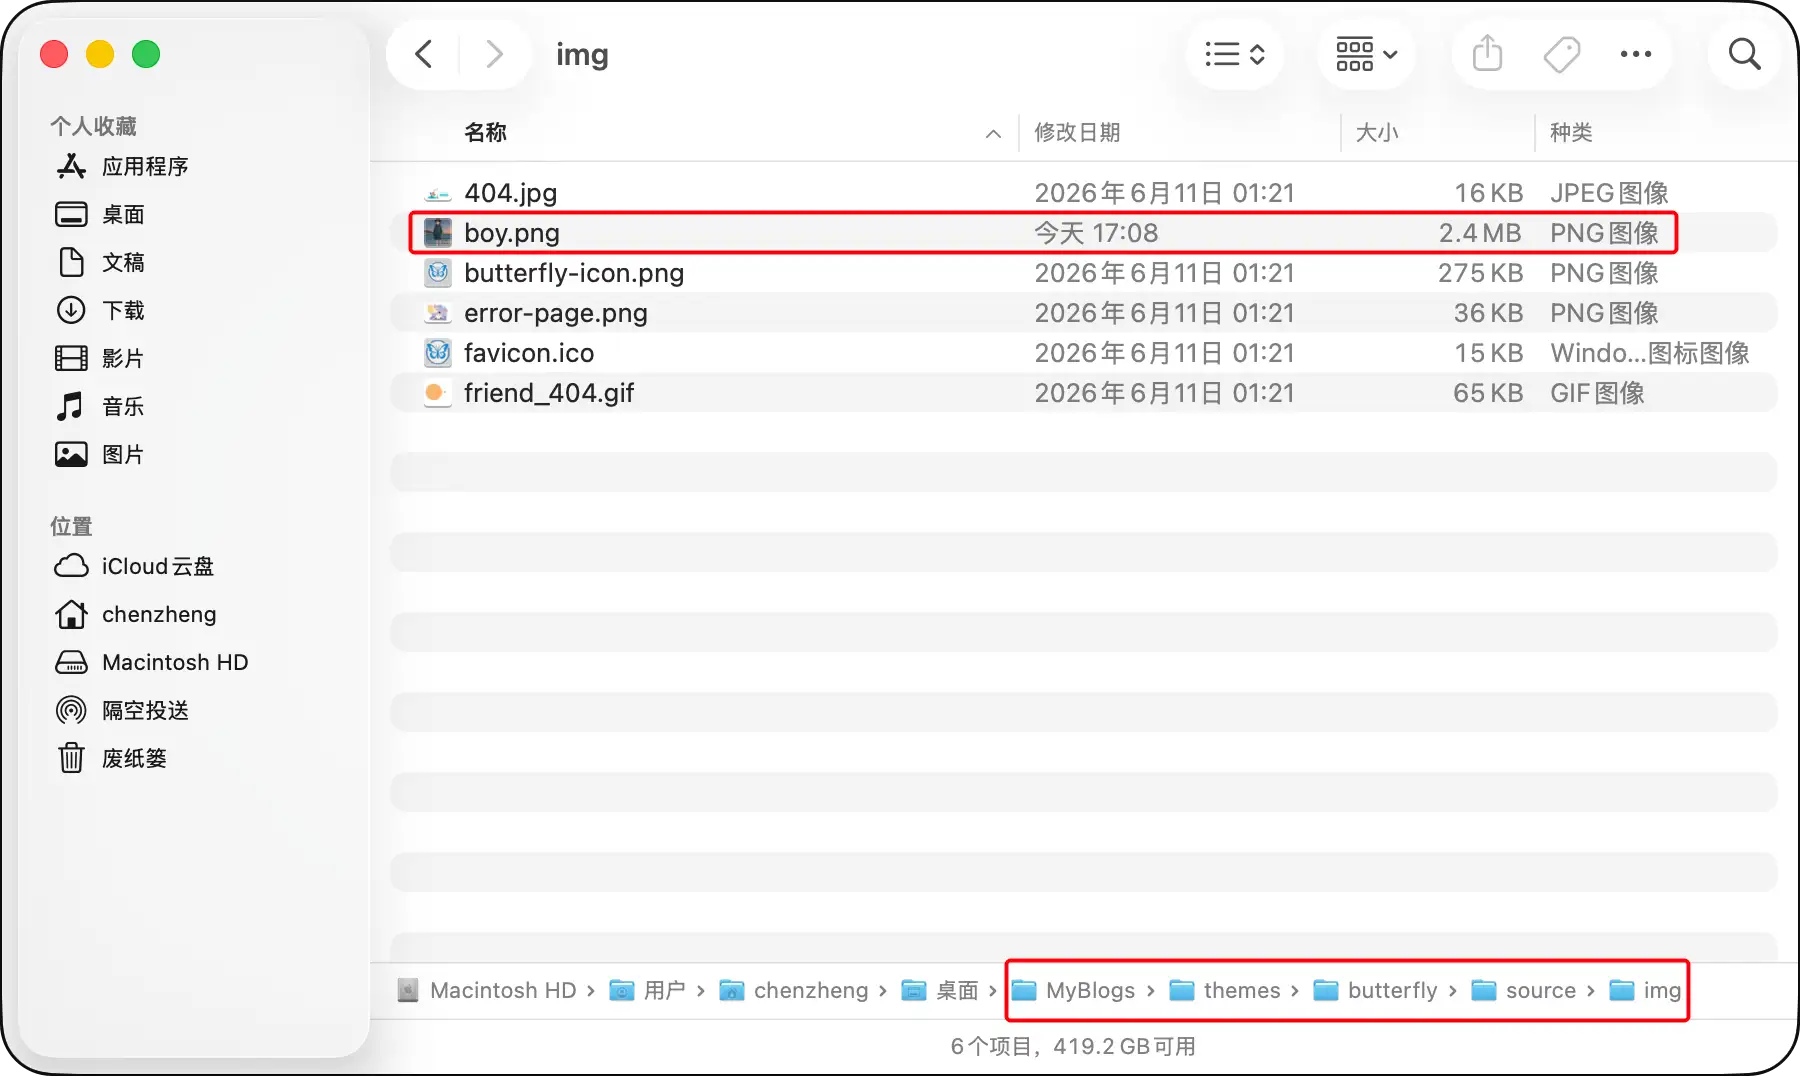
第二步:在主题配置文件,搜索avatar,进行如下配置

1
2
3
4
# Avatar (頭像)
avatar:
img: /img/boy.png
effect: false

友情提示:配置项effect是一个特效,如果设置了true,那么头像就会一直转圈!

4.03:顶部图

顶部图又叫头图(top_img),就是首页的遮罩图片和其他页面上最上部的背景图,分为非文章页和文章页两类。

对于非文章页。它的取值逻辑是:

  • Front-matter 中设置的 top_img > 配置文件的配置项(下面 6 个) > 配置文件的 default_top_img

这里各自配置的top_img指如下几个:

配置项 对应哪个页面的顶部图
index_img 首页
archive_img 归档页
tag_img 标签页
tag_per_img 标签子页面(不同的标签可配置不同的顶部图)
category_img 分类页
category_per_img 分类子页面(不同的分类可配置不同的顶部图)

所以针对非文章页的顶部图,我采取的策略是:只在主题配置文件中配置 default_top_img。这样一来:

  • 所有非文章页的顶部图全部是一个;
  • 如果以后想修改某个非文章页的顶部图,就直接在对应页面的 Front-matter 中设置 top_img。

第一步,将默认头部图放到博客根目录下的 source/img 中:
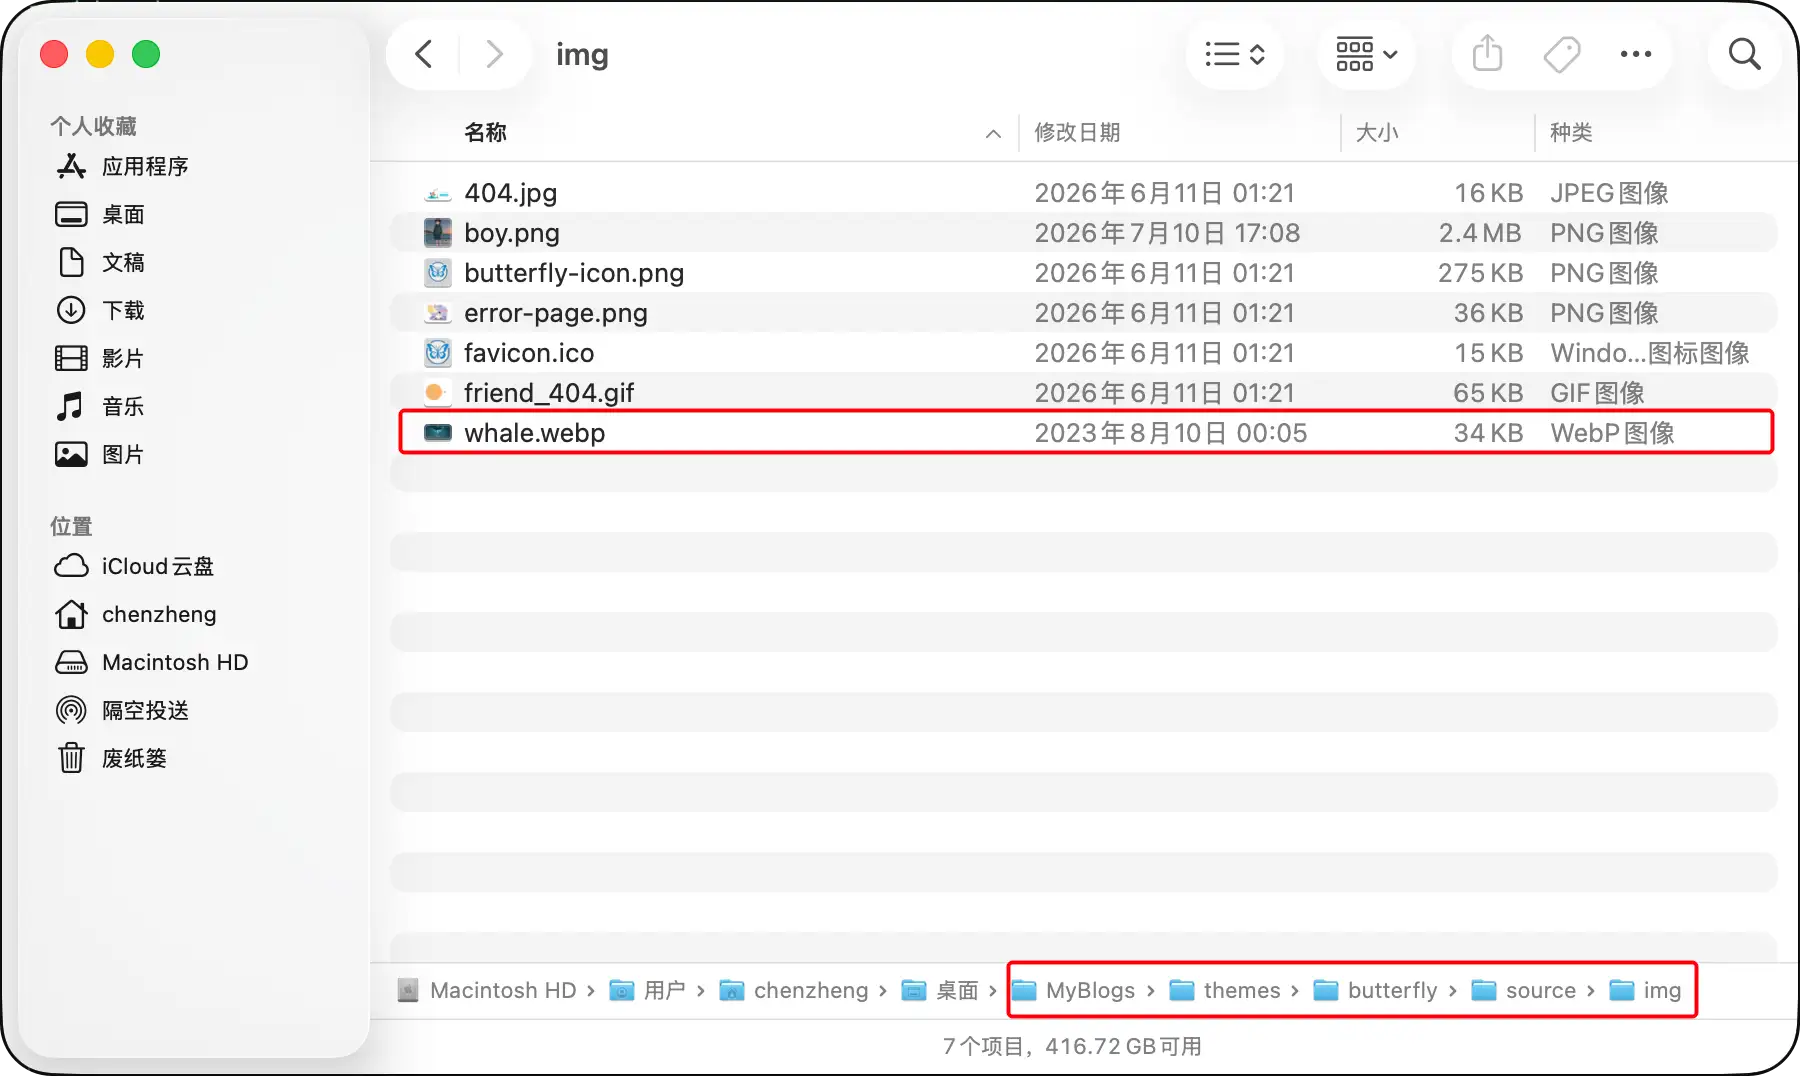
第二步,在主题配置文件中,修改 default_top_img :

1
2
# If the banner of page not setting, it will show the default_top_img
default_top_img: /img/whale.webp

对于文章页。它的取值逻辑是:

  • Front-matter 中的 top_img > Front-matter 中的 cover > 配置文件中的 cover > 配置文件中的 default_top_img

针对文章页的顶部图,我采取的策略是:

  • 不在主题配置文件中配置 cover,在文章的Front-matter 中只配置 cover 而不配置 top_img,这样 cover 就会变成文章页的顶部图;
  • 后面通过自己的魔改,让文章页的顶部图不现实(或者说显示背景图片);

4.04:网站背景

Butterfly 首页的背景默认是一张蓝色的纯色图片,可以修改为自己想要的图片。

第一步:把想用的图片放到主题根目录下的 /source/img 中:
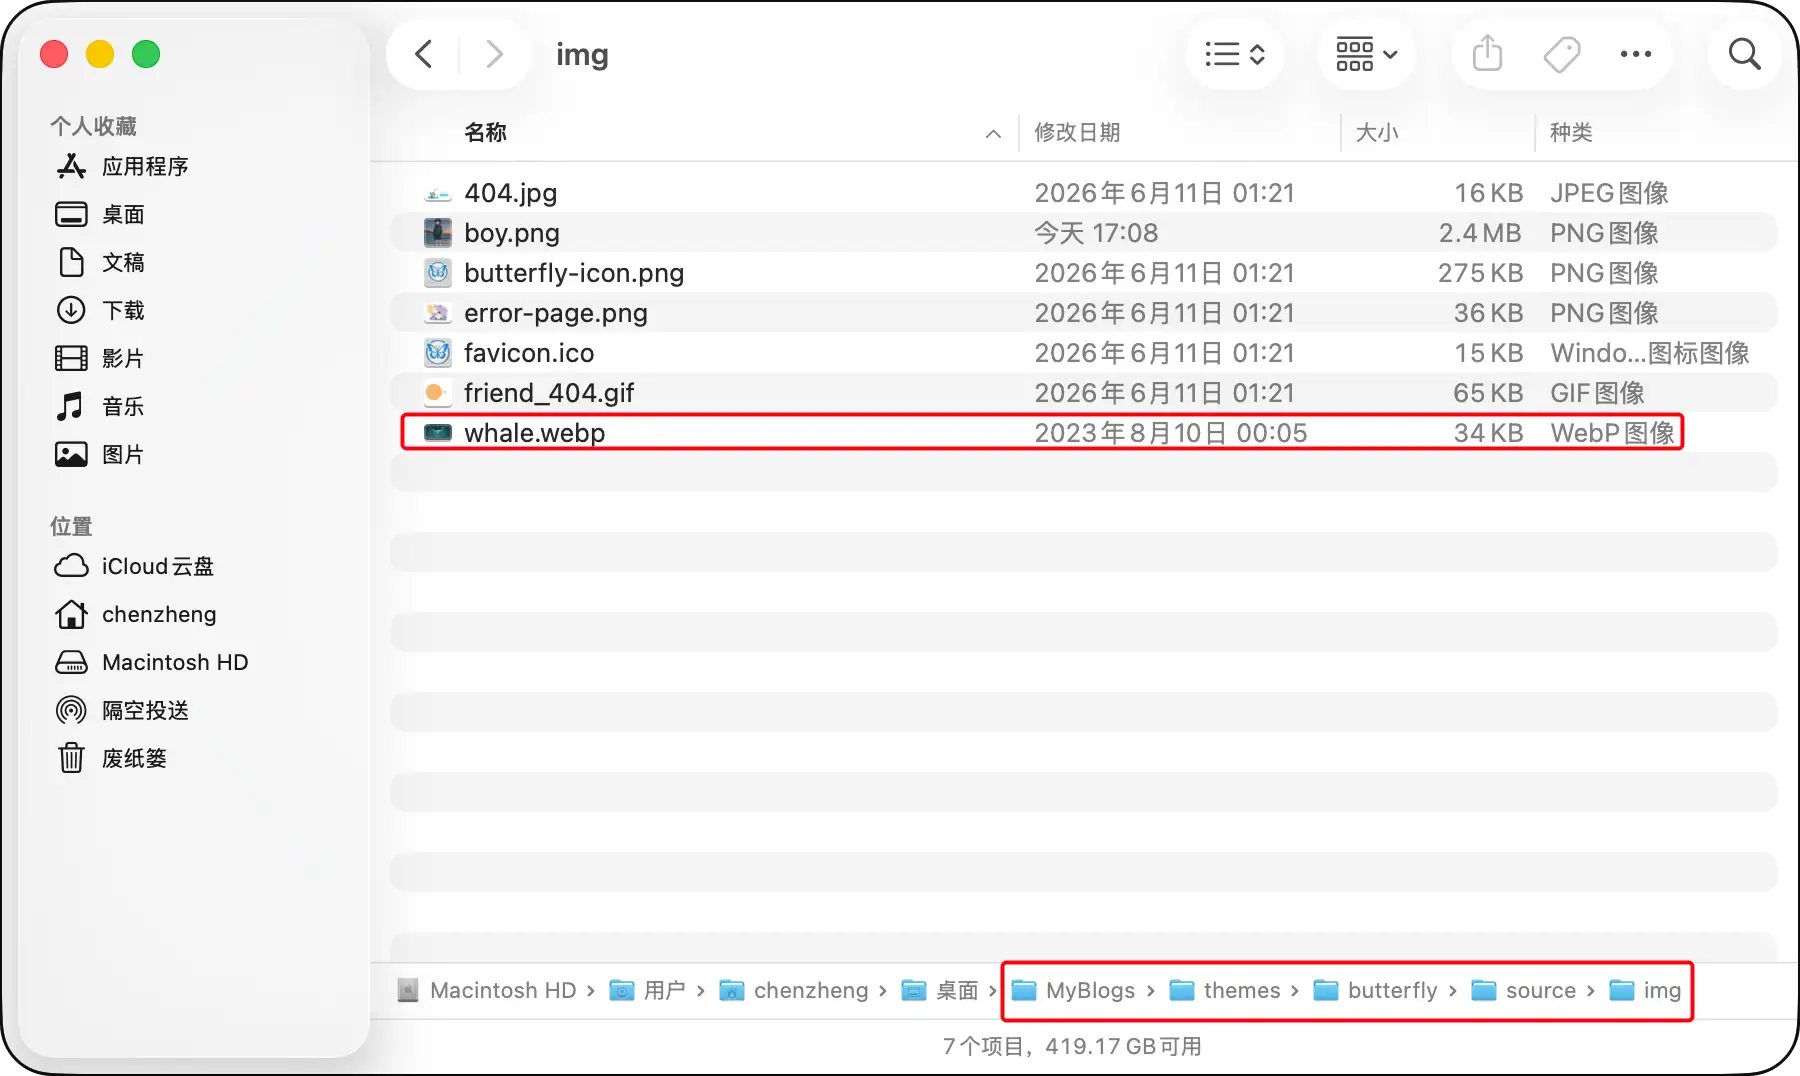
第二步:在主题配置文件,搜索background,进行如下配置

1
2
3
4
# Website Background
# Can set it to color, image URL or an array containing colors and/or image URLs
# If an array is provided, a random background will be selected from the array on each load
background: /img/whale.webp

4.05:页脚背景

主题

配置值 效果
留空 / false 显示默认的颜色
图片链接 显示配置的图片
颜色值:
HEX 值 - #0000FF
RGB 值 - rgb(0,0,255)
顔色單詞 - orange
漸變色 - linear-gradient (135deg, #E2B0FF 10%, #9F44D3 100%)
显示对应的颜色
transparent 透明
true 显示跟top_img一样

我选择将页脚设置为透明:

1
2
# The background image of footer
footer_img: transparent

4.06:文章封面

文章封面我采取默认的:

1
2
3
4
5
6
7
8
9
# 不设置cover,所以后面每篇文章都要单独设置top_img和cover,因为这俩图片尺寸不同
cover:
# Disable the cover or not
index_enable: true
aside_enable: true
archives_enable: true
# When cover is not set, the default cover is displayed
default_cover:
# - xxx.jpg

因为今后我会在每篇文章的 Front-matter 中单独设置 cover 和 top_img。

第五节:首页的设置

5.01:顶部图大小

使用默认的:

1
2
3
4
5
6
# The top_img settings of home page
# default: top img - full screen, site info - middle
# The position of site info, eg: 300px/300em/300rem/10%
index_site_info_top:
# The height of top_img, eg: 300px/300em/300rem
index_top_img_height:

5.02:网站副标题

配置如下:

1
2
3
4
5
6
7
8
9
10
11
12
13
14
15
16
17
18
19
20
# 首页副标题,The subtitle on homepage
# 主题提供了在主页标题的下面展示副标题,也可以用自己语言替换副标题,或者调用第三方服务
subtitle:
enable: true # 总开关,设置为true的同时又不设置下面的内容,那么在主页的标题下面会显示副标题
# Typewriter Effect (打字效果)
effect: true
# Customize typed.js (配置typed.js)
# https://github.com/mattboldt/typed.js/#customization
typed_option:
# source 调用第三方服务
# source: false 关闭调用
# source: 1 调用一言网的一句话(简体) https://hitokoto.cn/
# source: 2 调用一句网(简体) https://yijuzhan.com/
# source: 3 调用今日诗词(简体) https://www.jinrishici.com/
# subtitle 會先显示source,再显示sub的內容
source: false
# 如果关闭打字效果,subtitle只会显示sub的第一行文字
sub:
- 如果认为自己做不到,那你就永远都做不到 -- 墨菲定律
- If it can go wrong,it will -- Murphy's Law

5.03:首页卡片布局

Butterfly 主题提供了 7 种首页文章卡片的布局结构,我选择使用默认的:

1
index_layout: 3

5.04:主页文章节选

因為主題 UI 的關係,主頁文章節選只支持自動節選和文章頁description。

因为主题 UI 的关系,主页文章节选只支持自动节选和文章页 description,我的配置如下:

1
2
3
4
5
6
7
8
9
10
# 首页文章节选
# Display the article introduction on homepage
# 1: description
# 2: both (if the description exists, it will show description, or show the auto_excerpt)
# 3: auto_excerpt (default)
# false: do not show the article introduction
index_post_content:
method: 2
# If you set method to 2 or 3, the length need to config
length: 500

我对这里没做大修改,只把 index_post_content.method 设置为 2,因为这样一来,只要我在文章的 Front-matter 中设置了 description,那么就展示 description 的内容,否则就展示文章的前 500 个字!这样比较灵活!

提示:description 不是 Hexo 内置的 Front-matter 参数,是主题 Butterfly 自建的参数!

第六节:文章页设置

6.01:TOC目录

在每一篇文章的侧边栏会有 TOC 目录,主题配置文件中可以配置它,我的配置如下:

1
2
3
4
5
6
7
toc:
post: true # 是否在文章页展示TOC目录
page: false # 是否在普通页展示TOC目录
number: false # 是否自动给TOC添加章节数(因为我编辑文章时会自己添加数字,所以设置为false)
expand: true # 是否默认展开TOC(我不喜欢目录收起的功能)
style_simple: false # 简洁模式,设置为true的话,侧边栏就只展示TOC,只对文章页有效
scroll_percent: true # 是否展示滚动百分比

PS:我后期会将其进行优化,优化后的效果为——默认展开两级,当浏览到某个三级标题时,再展开对应的三级标题!

6.02:文章版权

使用默认的:

1
2
3
4
5
6
7
# 文章版权
post_copyright:
enable: true # 是否启用版权声明
decode: false # 是否进行URL解码
author_href: # 版权栏作者名点击的跳转链接(这里不配置也可,因为站点配置文件中已配置URL)
license: CC BY-NC-SA 4.0
license_url: https://creativecommons.org/licenses/by-nc-sa/4.0/

6.03:打赏赞助

第一步,将微信赞赏码和支付宝收款码图片处理好,最合适的尺寸是 260*260,正方形;

第二步,将图片放到博客根目录下的 /source/img 中:
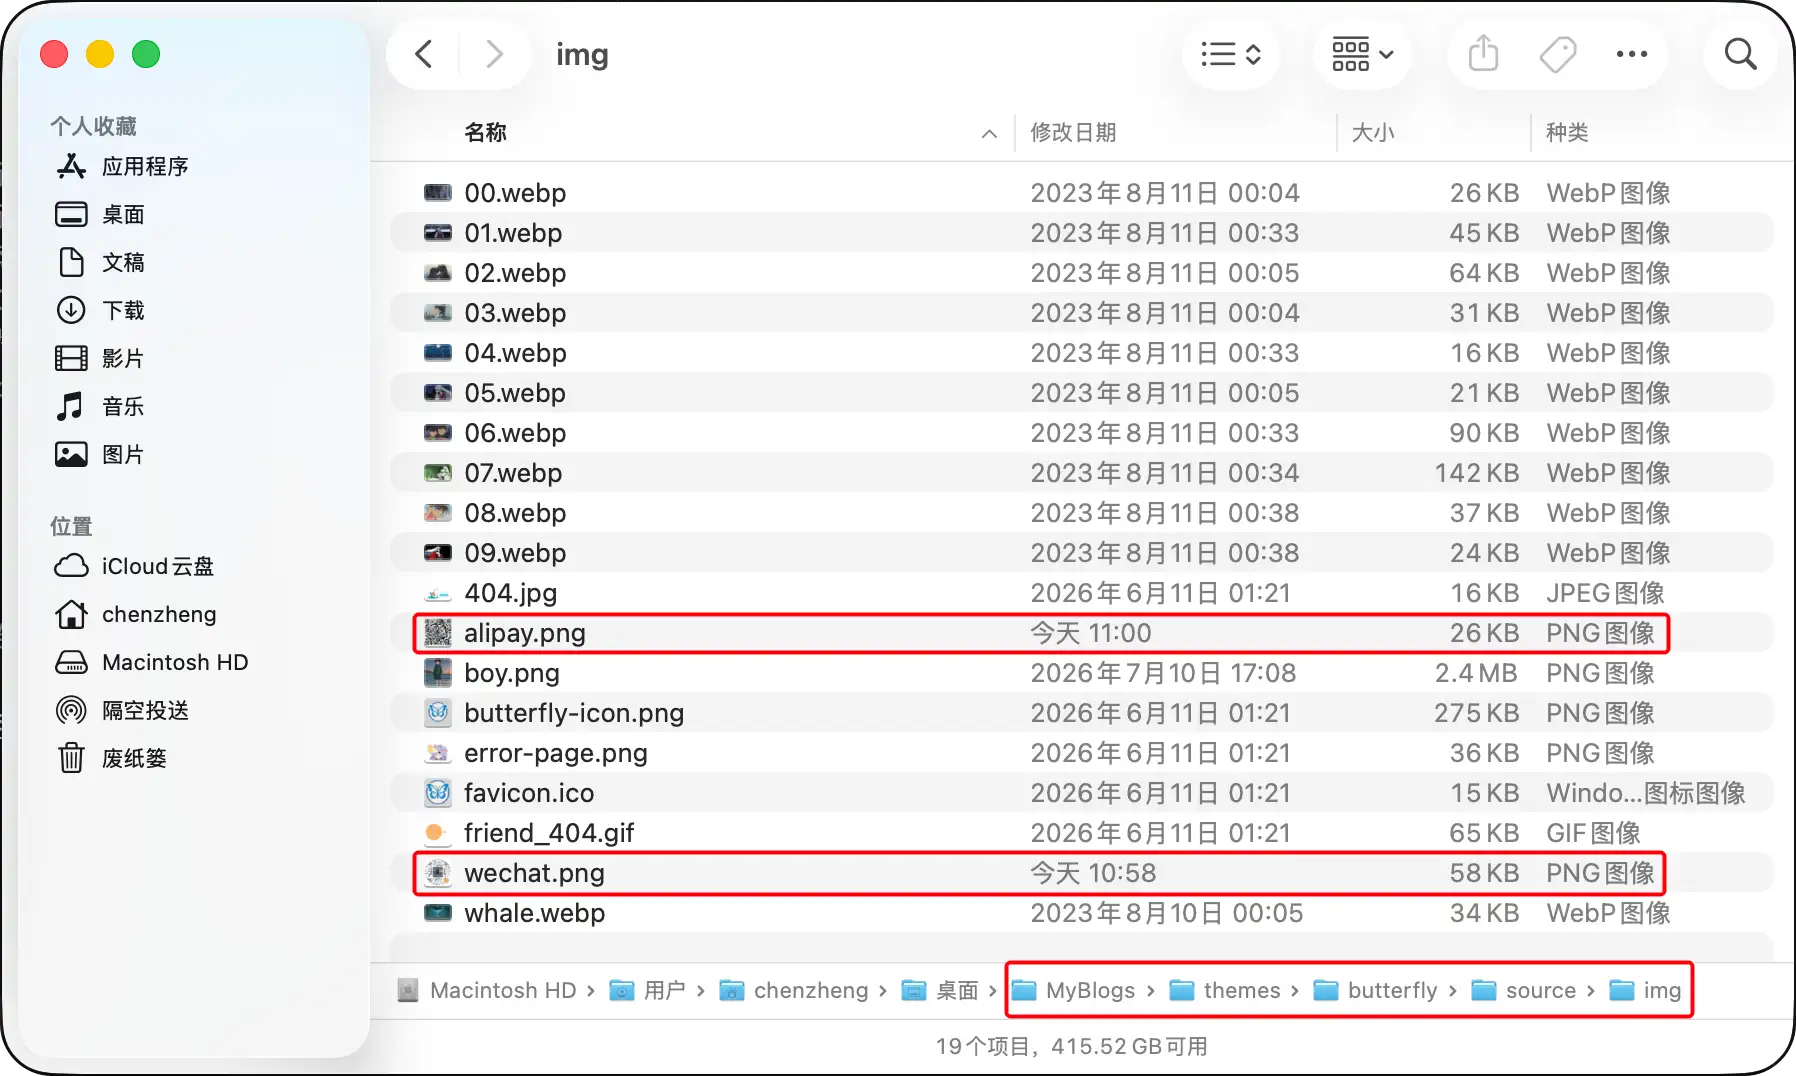
第三步,在主题配置文件中找到 reward 配置项,进行如下配置:

1
2
3
4
5
6
7
8
9
10
11
# 打赏赞助
reward:
enable: true
text: 支持一下
QR_code:
- img: /img/wechat.png
# link:
text: 微信
- img: /img/alipay.png
# link:
text: 支付宝

6.04:在线编辑

文章在线编辑 post_edit,开启后每篇文章底部会出现一个「编辑此页」按钮:
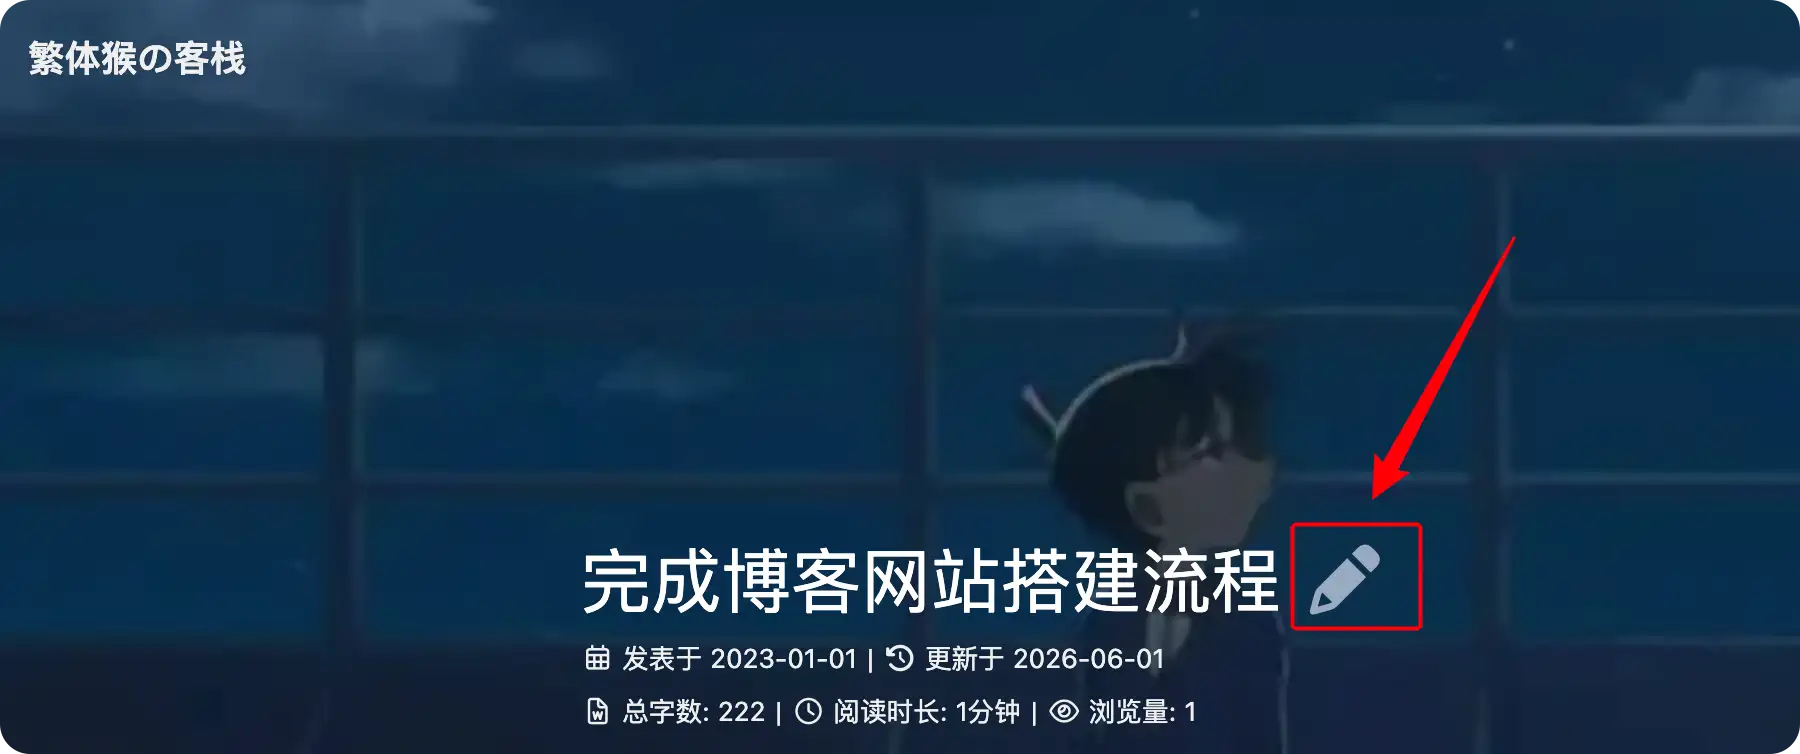
点击后,直接跳转到 GitHub/Gitee 在线编辑当前文章的 Markdown 源码,方便你快速修改博文,不用本地拉取仓库。但是我的 Hexo 源码是放在我本地的,部署的仓库中没有 Markdown 源码,只有生成的 html 文件,这种方式没办法使用在线编辑功能,我也不打算修改我的流程,所以就不开启了。

6.05:相关文章

在某篇文章的最后,上一篇下一篇的后面,会给出本站的推荐文章,相关文章的推荐原理是根据当前文章的标签的比重来推荐的!默认的配置如下,我觉得没必要修改,保持默认配置:

1
2
3
4
5
# 相关文章
related_post:
enable: true
limit: 6 # 展示的相关文章最大数量
date_type: created # 显示文章的创建日期或更新日期,created / updated

6.06:上/下一篇

文章的结尾处,会有上一篇下一篇的卡片按钮,默认情况下,下一篇是指你当前阅读的文章的上一篇(创建时间在当前文章的前面),这是很反人类的!可以修改默认的配置来修正这种逻辑:

1
2
3
4
5
6
# 上/下一篇
# Choose: 1 / 2 / false
# 1: The 'next post' will link to old post
# 2: The 'next post' will link to new post
# false: disable pagination
post_pagination: 2

6.07:过期提醒

假如文章过期了,可以在文章的最上面展示提醒,默认配置为:

1
2
3
4
5
6
7
8
# 过期提醒
noticeOutdate:
enable: false
style: flat # simple / flat
limit_day: 365 # When will it be shown
position: top # Position: top / bottom
message_prev: It has been
message_next: days since the last update, the content of the article may be outdated.

修改为:

1
2
3
4
5
6
7
8
# 过期提醒
noticeOutdate:
enable: false
style: flat # simple / flat
limit_day: 365 # When will it be shown
position: top # Position: top / bottom
message_prev: 这篇文章距离上次更新已经有
message_next: 天了,或许部分内容已经不够准确,请注意甄别,欢迎留言提醒!

6.08:图片描述

在 Butteryfly 中,关于图片描述有如下的配置:

1
2
# 图片描述
photofigcaption: true

在 Markdown 中,插入图片的语法是![alt text](image.jpg),开启了photofigcaption功能后,会将 Markdown 插图中的 alt 文本作为图片的标题描述,放到图片的正下方!假如没有 alt 文本的话,就不会展示了,并且也不会留出来多余的空间!

6.09:分享按钮

文章底部有很多分享按钮,Butterfly 内置了两种分享系统,分别是 Sharejs 和 Addtoany,默认使用 Sharejs 即可:

1
2
3
4
5
6
7
8
9
10
11
12
13
14
share:
# Choose: sharejs / addtoany
# Leave it empty if you don't need share
use: sharejs

# Share.js
# https://github.com/overtrue/share.js
sharejs:
sites: facebook,x,wechat,weibo,qq

# AddToAny
# https://www.addtoany.com/
addtoany:
item: facebook,x,wechat,sina_weibo,facebook_messenger,email,copy_link

6.10:数学公式

假如博客中需要写数学公式的话,就需要用数学渲染引擎来渲染。Butterfly 提供了两种渲染引擎:MathJax 和 KaTeX,默认是不开启的。假如不需要写数学公式的话,就没必要配置这个了。我这里使用默认的(不开启):

1
2
3
4
5
6
7
8
9
10
11
12
13
14
15
16
17
18
19
# About the per_page
# if you set it to true, it will load mathjax/katex script in each page
# if you set it to false, it will load mathjax/katex script according to your setting (add the 'mathjax: true' or 'katex: true' in page's front-matter)
math:
# Choose: mathjax, katex
# Leave it empty if you don't need math
use:
per_page: true
hide_scrollbar: false

mathjax:
# Enable the contextual menu
enableMenu: true
# Choose: all / ams / none, This controls whether equations are numbered and how
tags: none

katex:
# Enable the copy KaTeX formula
copy_tex: false

6.11:大图模式

默认情况下,文章页的图片是点不开的,就固定在文章页中,但是可以开启大图查看模式,点击后可以将图片单独点开放大查看。Butterfly 提供了两种大图查看模式,我的配置如下:

1
2
3
4
5
# Choose: fancybox / medium_zoom
# https://github.com/francoischalifour/medium-zoom
# https://fancyapps.com/fancybox/
# Leave it empty if you don't need lightbox
lightbox: fancybox

第七节:页脚相关

Butterfly 主题的每个页面都有页脚,页脚可以用来展示信息,默认的信息如下:

1
2
3
4
5
6
7
8
9
10
footer:
nav:
owner:
enable: true
since: 2025
# Copyright of theme and framework
copyright:
enable: true
version: true
custom_text:

7.01:页脚导航栏

导航栏文本通过footer.nav来进行配置,我的设置如下:

1
2
3
4
5
6
7
8
9
10
11
12
13
14
15
16
17
18
19
20
21
22
23
24
25
26
27
28
29
30
31
32
33
34
35
36
37
38
39
40
41
42
43
44
45
46
47
48
49
50
51
52
53
54
55
nav:
- content:
- title: XX
item:
- title: 🚀 快速开始
url:
- title: 📑 主题页面
url:
- title: 📌 主题配置
url:
- title: ⚔️ 标签外挂
url:
- title: 主题答问
url:
- title: ⚡️ 进阶教程
url:
- content:
- title: 休闲
item:
- title: 照片展
url: /gallery/
- title: 图书馆
url: /books/
- title: 电影院
url: /movies/
- title: 音乐汇
url: /music/
- title: 玩游戏
url: /games/
- content:
- title: XX
item:
- title: XXXXXX
url:
- title: XXXXXX
url:
- title: XXXXXX
url:
- title: XXXXXX
url:
- title: XXXXXX
url:
- content:
- title: XX
item:
- title: XXXXXX
url:
- title: XXXXXX
url:
- title: XXXXXX
url:
- title: XXXXXX
url:
- title: XXXXXX
url:

PS:这里暂时先这样,至于放哪些页面、修改布局等,我放在后面继续优化,这里先做个占位!

7.02:博客年份

1
2
3
owner:
enable: true
since: 2023

7.03:框架版本

在页脚展示 Hexo 框架和 Butterfly 主题:

1
2
3
copyright:
enable: true
version: false

7.04:自定义文本

我没有设置自定义文本,采用默认设置(留空):

1
custom_text:

第八节:侧边栏设置

8.01:基本设置

1
2
3
4
5
6
7
8
9
10
11
aside:
enable: true # 是否启用侧边栏,设置为false的话可以关闭所有的侧边栏,并且让主体内容变宽,占据侧边栏原本的空间
hide: false # 是否隐藏侧边栏,设置为true的话,侧边栏会被隐藏,原本显示侧边栏的地方就成了空白区域
button: true # 是否显示隐藏侧边栏的按钮
mobile: true # 是否在移动端展示侧边栏
position: right # 侧边栏展示位置,left/right
# 侧边栏展示
display:
archive: true # 归档页是否展示侧边栏
tag: true # 标签页是否展示侧边栏
category: true # 分类页是否展示侧边栏

8.02:站长信息

1
2
3
4
5
6
7
8
9
# 站长信息
card_author:
enable: true # 是否显示作者信息
description: 进一步有近一步的欢喜 # 是否展示作者名称下面的文字描述,假如不设置的话,就展示站点配置文件中的描述
button:
enable: true # 是否显示头像下面的按钮
icon: fab fa-github
text: 我的Github
link: https://github.com/fattymonkey

8.03:公告卡片

1
2
3
4
# 公告卡片
card_announcement:
enable: true # 是否显示
content: 网站重建不久,许多功能尚未完善,正在努力建设中~~ # 公告内容

8.04:最新文章

1
2
3
4
5
6
# 最新文章卡片
card_recent_post:
enable: true # 是否显示
limit: 6 # 显示的最新文章的数量,If set 0 will show all
sort: date # 最新文章排序,date / updated
sort_order: # Don't modify the setting unless you know how it works

9.05:最新评论

1
2
3
4
5
6
7
# 最新评论卡片
card_newest_comments:
enable: false # 是否显示
sort_order: # Don't modify the setting unless you know how it works
limit: 6 # 显示评论数量,If set 0 will show all
storage: 10 # 保存时间,单位分钟,保存到本地存储,避免每次刷新都重新请求数据
avatar: true # 是否显示头像

8.05:分类卡片

1
2
3
4
5
6
# 分类卡片
card_categories:
enable: true # 是否显示
limit: 8 # 显示分类数量,If set 0 will show all
expand: none # 是否展开分类,none / true / false
sort_order: # Don't modify the setting unless you know how it works

8.06:标签卡片

1
2
3
4
5
6
7
8
9
# 标签卡片
card_tags:
enable: true # 是否显示
limit: 40 # 显示标签的数量,If set 0 will show all
color: true # 是否显示标签颜色
custom_colors:
orderby: random # 标签排序方式,random/name/length
order: 1 # 排序方式,1为生序,-1为降序
sort_order: # Don't modify the setting unless you know how it works

8.07:归档卡片

1
2
3
4
5
6
7
8
# 归档卡片
card_archives:
enable: true # 是否显示
type: monthly # 归档类型,monthly / yearly
format: MMMM YYYY # 归档显示格式,Eg: YYYY年MM月
order: -1 # 排序方式,1为生序,-1为降序
limit: 8 # 显示数量,If set 0 will show all
sort_order: # Don't modify the setting unless you know how it works

8.08:系列卡片

1
2
3
4
5
6
# 文章系列卡片
card_post_series:
enable: true # 是否显示
series_title: false # 是否显示系列名称,The title shows the series name
orderBy: 'date' # Order by title or date
order: -1 # 排序方式,1为生序,-1为降序

8.09:网站信息

1
2
3
4
5
6
7
8
9
10
# 网站信息卡片
card_webinfo:
enable: true # 是否显示
post_count: true # 是否显示文章数量
last_push_date: true # 是否显示最后更新时间
sort_order: # Don't modify the setting unless you know how it works
# Time difference between publish date and now
# Formal: Month/Day/Year Time or Year/Month/Day Time
# Leave it empty if you don't enable this feature
runtime_date: 2023/01/01

8.10:自定义卡片

Butterfly 主题还支持在侧边栏自定义添加栏目,我这里暂时先不添加,具体教程参考官网自定義添加欄目

第九节:右下角按钮

9.01:按钮位置

当开放 chat 聊天服务后,聊天服务的按钮可能会遮挡到右下角的按钮,所以 Butterfly 主题提供了修改右下角按钮的配置项。非必要不建议设置,默认就行。(我觉得博客网站不该有在线聊天功能,所以我压根就不需要修改这个配置)

1
2
# The distance between the bottom right button and the bottom (default unit: px)
rightside_bottom:

9.02:繁简转换

主题内置了一个简单的简繁转换功能,采用一对一的形式配对。默认是关闭的,需要在主题配置文件中开启:

1
2
3
4
5
6
7
8
9
10
11
12
13
14
# 繁简转换按钮
# Conversion between Traditional and Simplified Chinese
translate:
enable: true
# The text of a button
default:
# the language of website (1 - Traditional Chinese/ 2 - Simplified Chinese)
defaultEncoding: 2
# Time delay
translateDelay: 0
# The text of the button when the language is Simplified Chinese
msgToTraditionalChinese: '繁'
# The text of the button when the language is Traditional Chinese
msgToSimplifiedChinese: '简'

提示:遇到一字多繁或者一字多简的情况下,会出现不能正常转换的现象。

9.03:阅读模式

阅读模式下,会去掉除文章外的内容,避免干扰阅读,只会出现在文章页。默认就是开启的,不用修改配置:

1
2
# 阅读模式
readmode: true

9.04:夜间模式

夜间模式按钮默认就有,我使用默认的配置:

1
2
3
4
5
6
7
8
9
10
11
12
13
# 夜间模式
darkmode:
enable: true
# Toggle Button to switch dark/light mode
button: true
# Switch dark/light mode automatically
# autoChangeMode: 1 Following System Settings, if the system doesn't support dark mode, it will switch dark mode between 6 pm to 6 am
# autoChangeMode: 2 Switch dark mode between 6 pm to 6 am
# autoChangeMode: false
autoChangeMode: false
# Set the light mode time. The value is between 0 and 24. If not set, the default value is 6 and 18
start:
end:

9.05:显示百分比

在页面滚动查看时(不仅是文章页),右下角按钮显示阅读的百分比,这个功能默认是关闭的,需要修改配置来开启:

1
2
3
# 显示百分比
# Show scroll percent in scroll-to-top button
rightside_scroll_percent: true

9.06:按钮排序

可对右下角按钮进行排序,我这里没有修改,直接使用默认的:

1
2
3
4
5
6
7
8
9
10
# 按钮排序
# Don't modify the following settings unless you know how they work
# Choose: readmode,translate,darkmode,hideAside,toc,chat,comment
# Don't repeat the same value
rightside_item_order:
enable: false
# Default: readmode,translate,darkmode,hideAside
hide:
# Default: toc,chat,comment
show:

第十节:全局设置

10.01:页面锚点

文章锚点这个功能在分享文章链接时还是很好用的,但是我觉得它弊大于利,所以我还是使用默认的,不开启:

1
2
3
4
5
6
# 页面锚点
anchor:
# When you scroll, the URL will update according to header id.
auto_update: false
# Click the headline to scroll and update the anchor
click_to_scroll: false

10.02:复制行为

可设置网站是否可以复制、复制的内容是否添加版权信息,我的配置如下:

1
2
3
4
5
6
# 复制行为
copy:
enable: true # 是否允许复制(设置为false后,代码块仍然可以通过点击来复制全部)
copyright:
enable: false # 是否在复制的内容后面加上版权信息
limit_count: 150 # 字数限制,当复制的文字大于这个数字的时候,才增加版权信息

10.03:字数统计

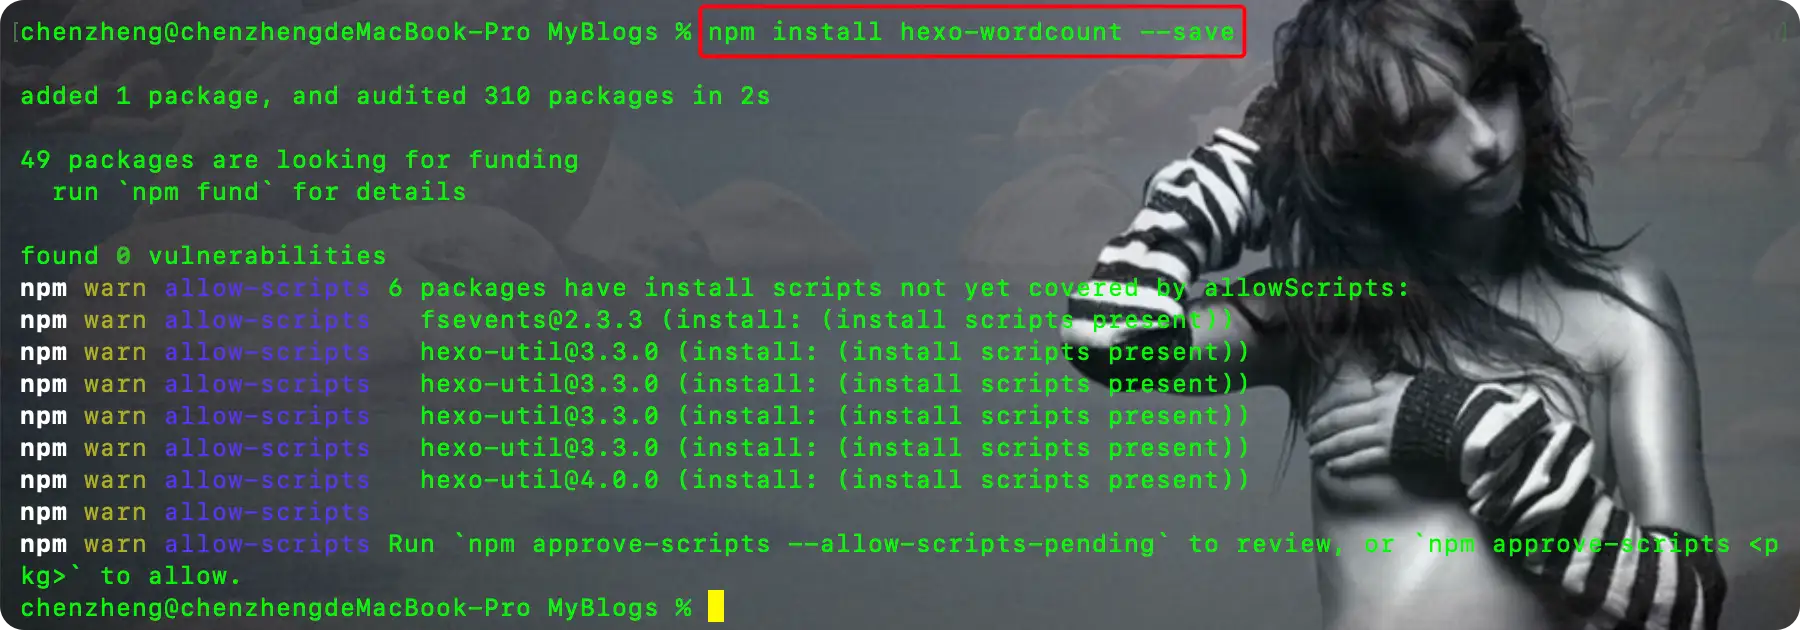
Butterfly 主题可以展示字数统计,但是该功能需要安装插件 hexo-wordcount,所以需要先安装该插件!

第一步:打开终端切换到本地博客工程根目录下,执行如下命令来安装插件

1
npm install hexo-wordcount --save

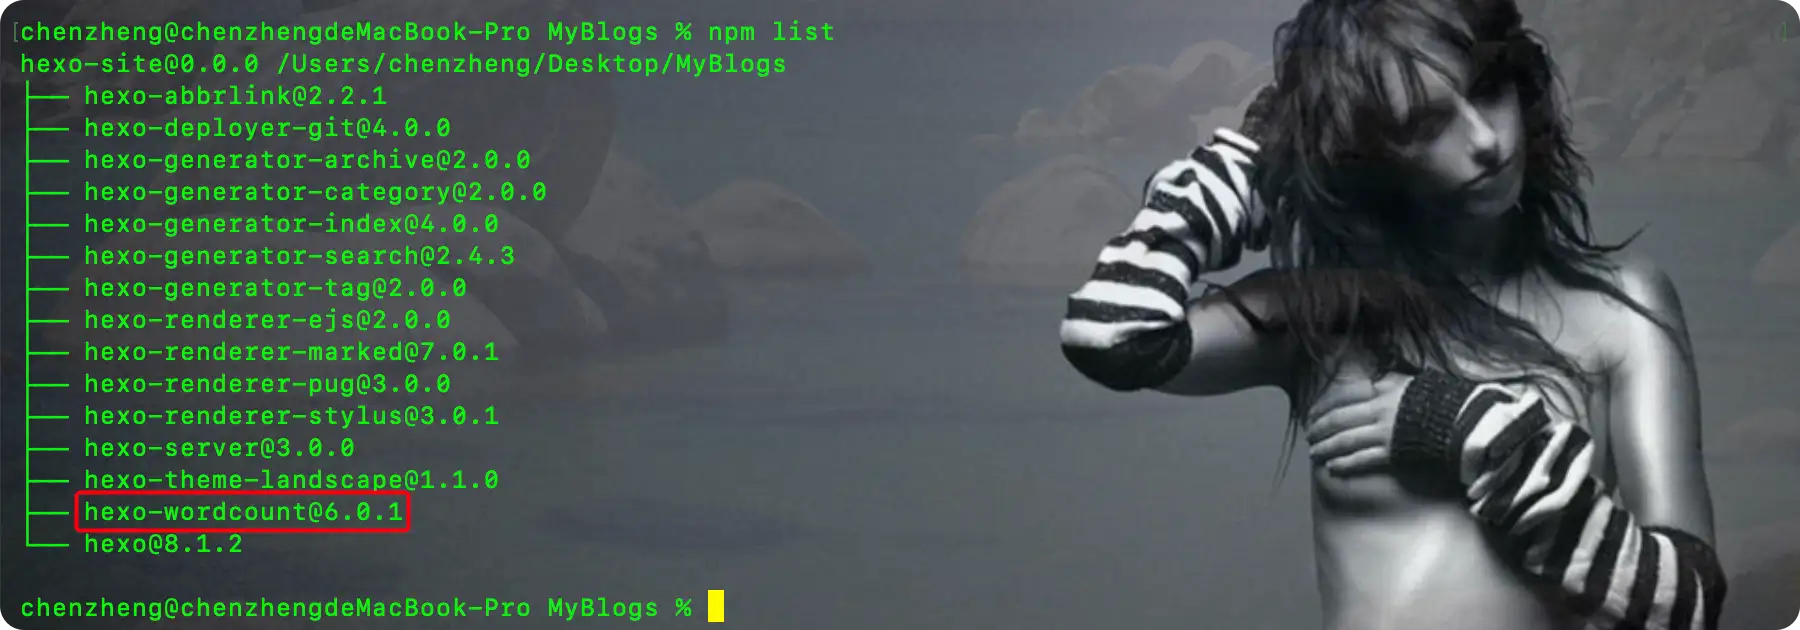
查看确保依赖是否安装成功:

第二步:打开主题配置文件,进行字数统计的配置

1
2
3
4
5
6
# Need to install the hexo-wordcount plugin
wordcount:
enable: true # 字数统计开关
post_wordcount: true # 文章页的字数统计
min2read: true # 显示文章阅读时长
total_wordcount: true # 打开后展示站点总字数

10.04:访问统计

1
2
3
4
5
6
# 访问统计
# Busuanzi count for PV / UV in site
busuanzi:
site_uv: true
site_pv: true
page_pv: true

注意:假如想修改这里的文字,就修改主题根目录下的languages中的zh-CN.yml文件!

10.05:本地搜索

Butterfly 主题提供了两种本地搜索的选项,我选择使用的是插件 hexo-generator-search

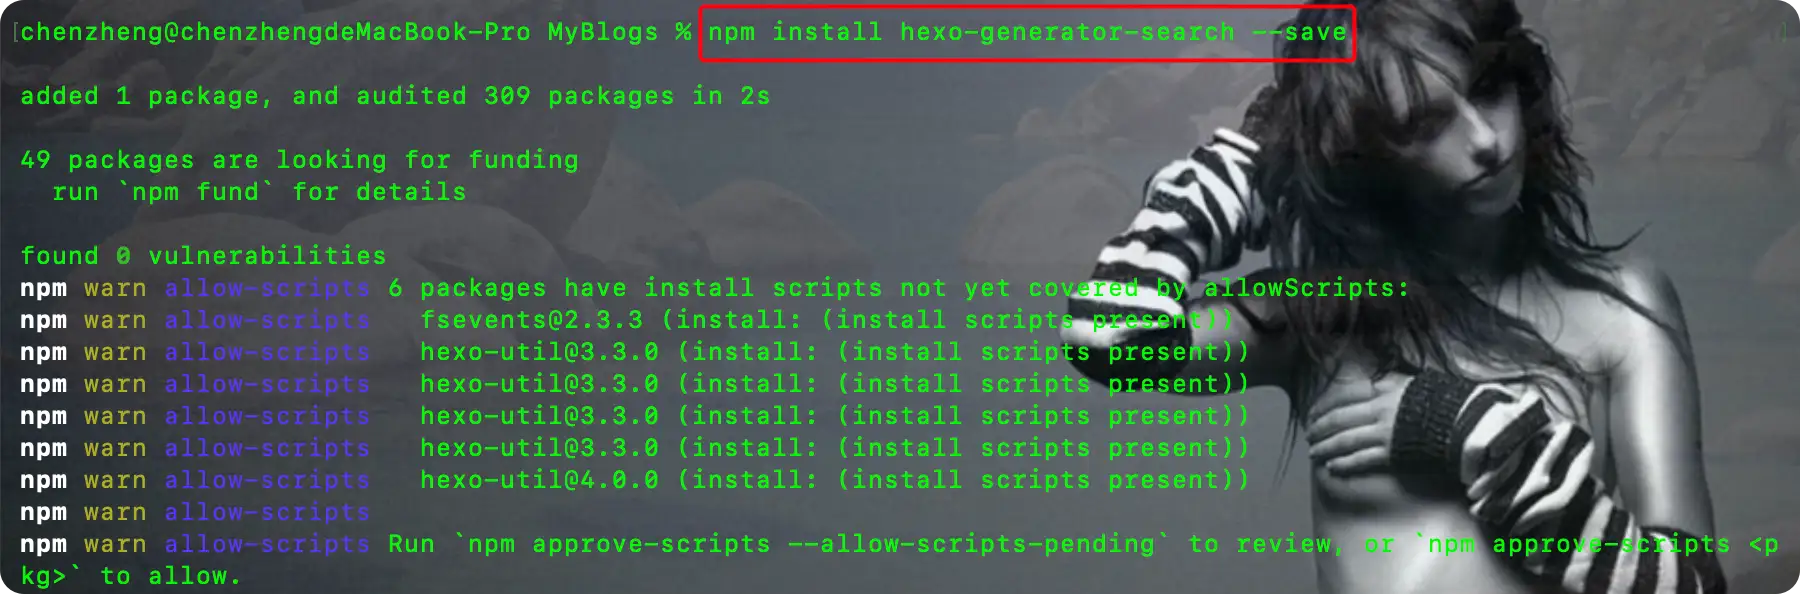
第一步:打开终端切换到本地博客工程根目录下,执行如下命令来安装插件

1
npm install hexo-generator-search --save

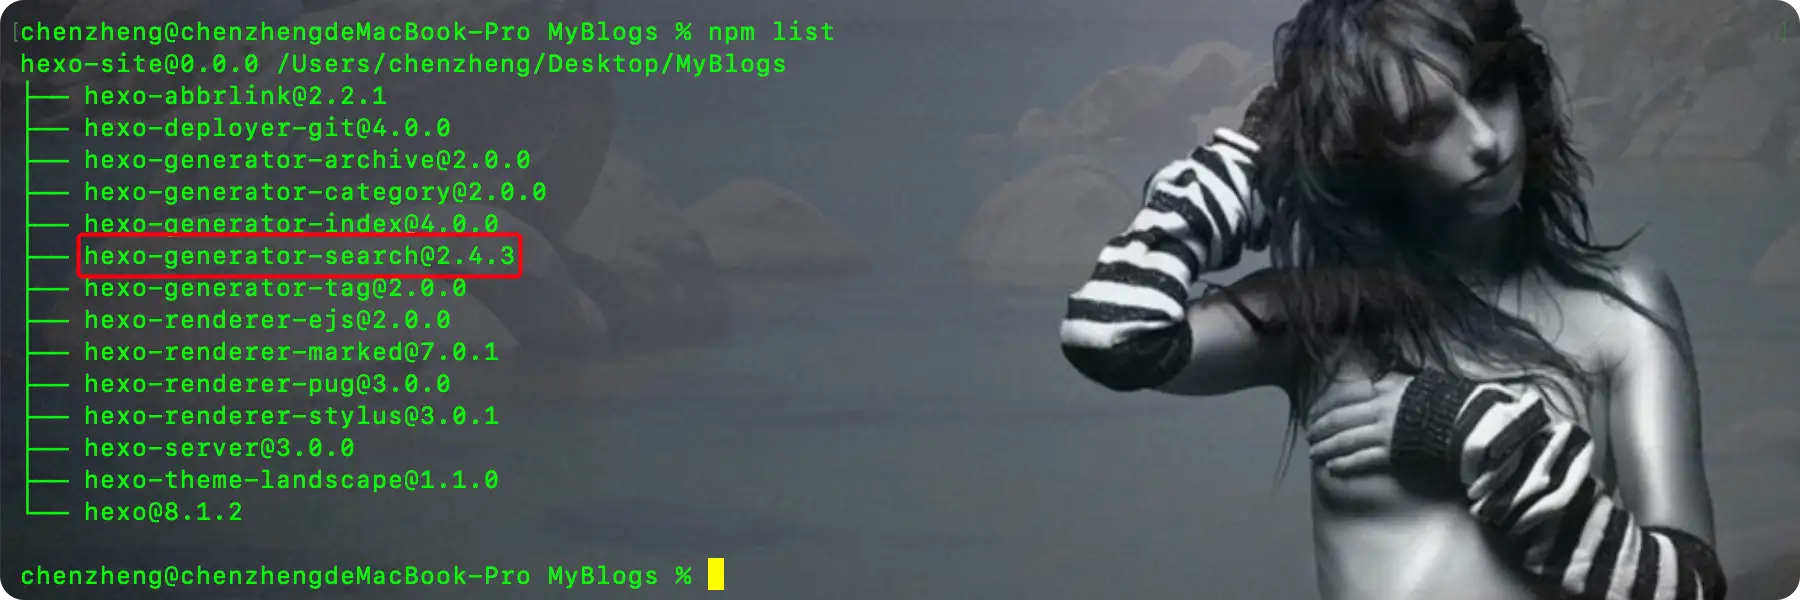
使用npm list来确保一下依赖是否安装成功:

第二步:打开站点配置文件,添加如下的配置

1
2
3
4
5
# 本地搜索
search:
path: search.xml
field: all
content: true

第三步:打开主题配置文件,修改search配置项:

1
2
3
4
5
6
7
8
9
10
11
12
13
14
15
16
17
18
19
20
21
22
23
24
25
search:
# Choose: algolia_search / local_search / docsearch
# leave it empty if you don't need search
use: local_search
placeholder: 请输入搜索关键字

# Algolia Search
algolia_search:
# Number of search results per page
hitsPerPage: 6

# Local Search
local_search:
# Preload the search data when the page loads.
preload: true
# Show top n results per article, show all results by setting to -1
top_n_per_article: 1
# Unescape html strings to the readable one.
unescape: false
# Enable pagination for search results
pagination:
enable: true
# Number of search results per page
hitsPerPage: 8
CDN:

第十一节:其他设置

11.01:分析统计

1
2
3
4
5
6
7
8
9
10
11
12
13
14
15
16
17
18
19
20
21
22
23
24
25
26
27
28
29
30
31
32
# https://tongji.baidu.com/web/welcome/login
baidu_analytics:

# https://analytics.google.com/analytics/web/
google_analytics:

# https://www.cloudflare.com/zh-tw/web-analytics/
cloudflare_analytics:

# https://clarity.microsoft.com/
microsoft_clarity:

# https://umami.is/
umami_analytics:
enable: false
# For self-hosted setups, configure the hostname of the Umami instance
serverURL:
script_name: script.js
website_id:
option:
UV_PV:
site_uv: false
site_pv: false
page_pv: false
# Umami Cloud (API key) / self-hosted Umami (token)
token:

# https://www.googletagmanager.com/
google_tag_manager:
tag_id:
# optional
domain:

Butterfly 主题提供了网站访客数据统计功能,开启后,你能在对应平台后台查看:

  • 多少人访问你的博客、访客来自哪里
  • 用户打开了哪些文章、停留时长、访问设备(手机 / 电脑)
  • 搜索引擎来路、关键词等流量信息

主题内置支持 4 套统计工具(任选其一,不用同时开多个):

  1. 百度统计(baidu_analytics):国内首选,访问速度稳定,中文后台,适合面向大陆访客
  2. 谷歌分析(Google Analytics):海外好用,国内大概率无法正常加载、收集数据
  3. Cloudflare 分析:如果你网站域名托管在 Cloudflare,无需嵌入代码,在 CF 后台直接看流量
  4. Microsoft Clarity:微软访客分析,可以看访客鼠标点击录屏、热力图,国内外均可访问

我觉得这个数据没什么必要,好像配置了也没什么实际的作用,所以我没有修改默认配置,不开启任何分析统计。

11.02:网站验证

网站验证这里,分为两种情况:

  • 情况 A:你不在乎搜索引擎流量,不主动管收录;只是自己写写博客、分享给朋友看,完全不用配置,保持默认注释状态即可,百度爬虫想爬就爬,随缘。
  • 情况 B:你希望更多陌生人通过百度搜到你的技术文章,那么就得配置了,具体步骤如下
    • 去「百度搜索资源平台」注册账号
    • 添加你的域名
    • 启用这个验证配置,填入验证码,完成所有权校验
    • 之后就可以主动推送文章链接,优化收录

我这里不开启:

1
2
3
4
5
6
# 暂时不配置
site_verification:
# - name: google-site-verification
# content: xxxxxx
# - name: baidu-site-verification
# content: xxxxxxx

11.03:Snackbar

我的配置如下:

1
2
3
4
5
6
7
8
9
# Snackbar - Toast Notification
# https://github.com/polonel/SnackBar
# position: top-left / top-center / top-right / bottom-left / bottom-center / bottom-right
snackbar:
enable: true
position: top-right
# The background color of Toast Notification in light mode and dark mode
bg_light: '#49b1f5'
bg_dark: '#1f1f1f'

12.04:Instantpage

这个配置的作用是:当鼠标悬停到链接上超过 65 毫秒时,Instantpage 会对该链接进行预加载,可以提升访问速度。访客体验更好,站内跳转感觉飞快,不需要等待加载。

但我不开启这个功能,因为哪怕访客只是鼠标划过链接、最终不点进去,网页依旧会被下载,造成额外的资源消耗:

1
2
3
# Instant.page
# https://instant.page/
instantpage: false

12.05:PWA

我不打算启用 PWA 特性:

1
2
3
4
5
6
7
8
9
10
# PWA
# See https://github.com/JLHwung/hexo-offline
# ---------------
pwa:
enable: false
manifest:
apple_touch_icon:
favicon_32_32:
favicon_16_16:
mask_icon:

12.06:Open Graph

先用大白话说明什么是 Open Graph。当你把博客文章链接转发到微信、QQ、Discord、知乎、Twitter等平台时。

  • 不开启 Open Graph

    平台只能抓取纯文字链接,预览很简陋,没有封面图、简介,只有光秃秃一串网址。

  • 开启 Open Graph

​ 网页头部自动写入元信息。社交平台读取这些信息,生成漂亮的卡片预览。

使用默认的配置即可:

1
2
3
4
5
6
7
8
9
10
11
12
# Open graph meta tags
# https://hexo.io/docs/helpers#open-graph
Open_Graph_meta:
enable: true
option:
# twitter_card:
# twitter_image:
# twitter_id:
# twitter_site:
# google_plus:
# fb_admins:
# fb_app_id:

只要设置了enabletrue,当你分享到微信、QQ、飞书等平台会自动生成 OG 数据。至于注释的这些海外账户,则不需要配置。

12.07:CSS 前缀

有些 CSS 并不是所有浏览器都支持,需要增加对应的前缀才会生效。开启这个配置后,会自动为一些 CSS 增加前缀,但同时会增加 20% 的体积。

1
2
# Add the vendor prefixes to ensure compatibility
css_prefix: true

12.08:Inject

如果你想添加额外的js、css、meta等东西,可以在主题配置文件的Inject里添加,支持添加到 head(</body>标签之前)和 bottom(</html>标签之前)。

注意一:在主题配置文件的inject中,要以标准的 html 格式添加内容;

1
2
3
4
5
inject:
head:
- <link rel="stylesheet" href="/self.css">
bottom:
- <script src="xxxx"></script>

注意二:若你网站根目录不是/,使用本地图片时,需加上你的根目录,如网站是https://yoursite.com/blog,引用 css/xx.css,则设置为

1
2
3
inject:
head:
- <link rel="stylesheet" href="/blog/css/xx.css">

12.09:CDN

Butterfly 主题页面运行需要很多外部文件:图标库、jQuery、代码高亮 JS、Math 公式脚本等等。默认情况下,主题内置本地加载。CDN 配置作用:把这些静态资源地址替换成公共 CDN 网络链接。

简单理解:

  • 不配置 CDN:访客打开网页,从你的博客服务器下载这些 js、css 文件;
  • 配置 CDN:访客从「公共加速节点」下载文件。

针对我目前的博客来说,暂时先不配置 CDN,这也是 Butterfly 主题默认的行为。等以后加载缓慢了,再来优化这部分。